
This model was started less than a month after I finished the first attempt. While I was happy with most aspects of the first attempt, I realized that I could do some aspects better with the added experience. Also, I had elected to not address some details in the first attempt because I was worried that the model would become so overwhelming that I might not be able to finish. With the knowledge that I could finish, I decided to make sure I addressed those previously omitted details in this second build.
Another difference between the two models was how I started them. With the first model, I started by making sure which (altered) parts from the AMT/ERTL Cutaway Enterprise kit would match the two-thirds scale printing of my plans. This time, with the knowledge of what parts were going to work, I started the model without having a kit on hand to concentrate on the scratch built areas.
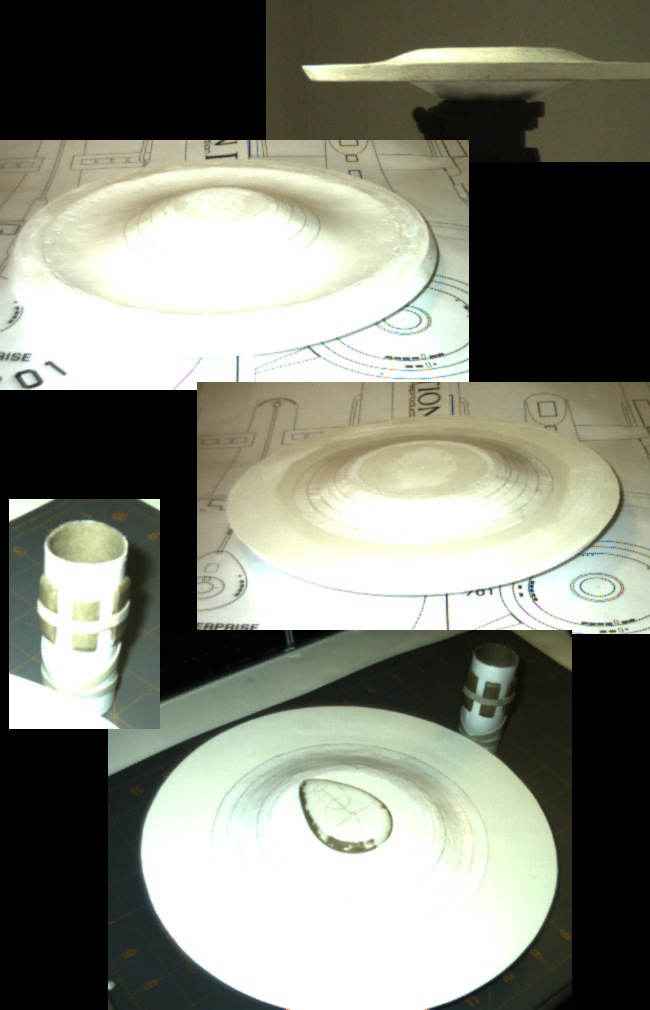
The primary hull started out (as before) as a collection of foamcore board pieces glued together. These pieces were cut to roughly match the outline of my plans.
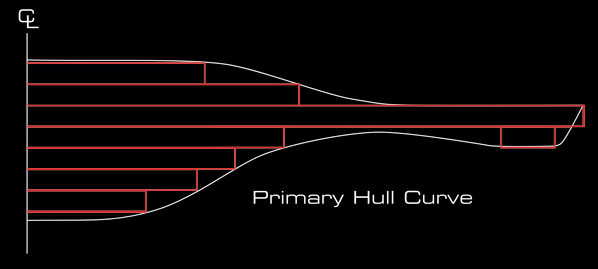
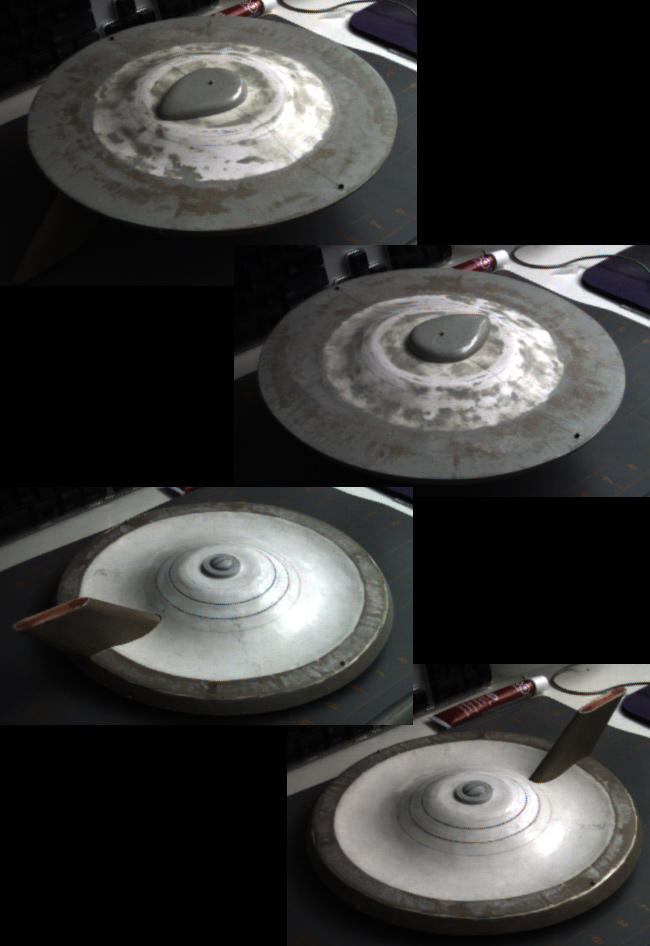
I then started to sculpt the curves using AMACO Sculptamold (cellulose-based paper maché), taking care to maintain symmetry.
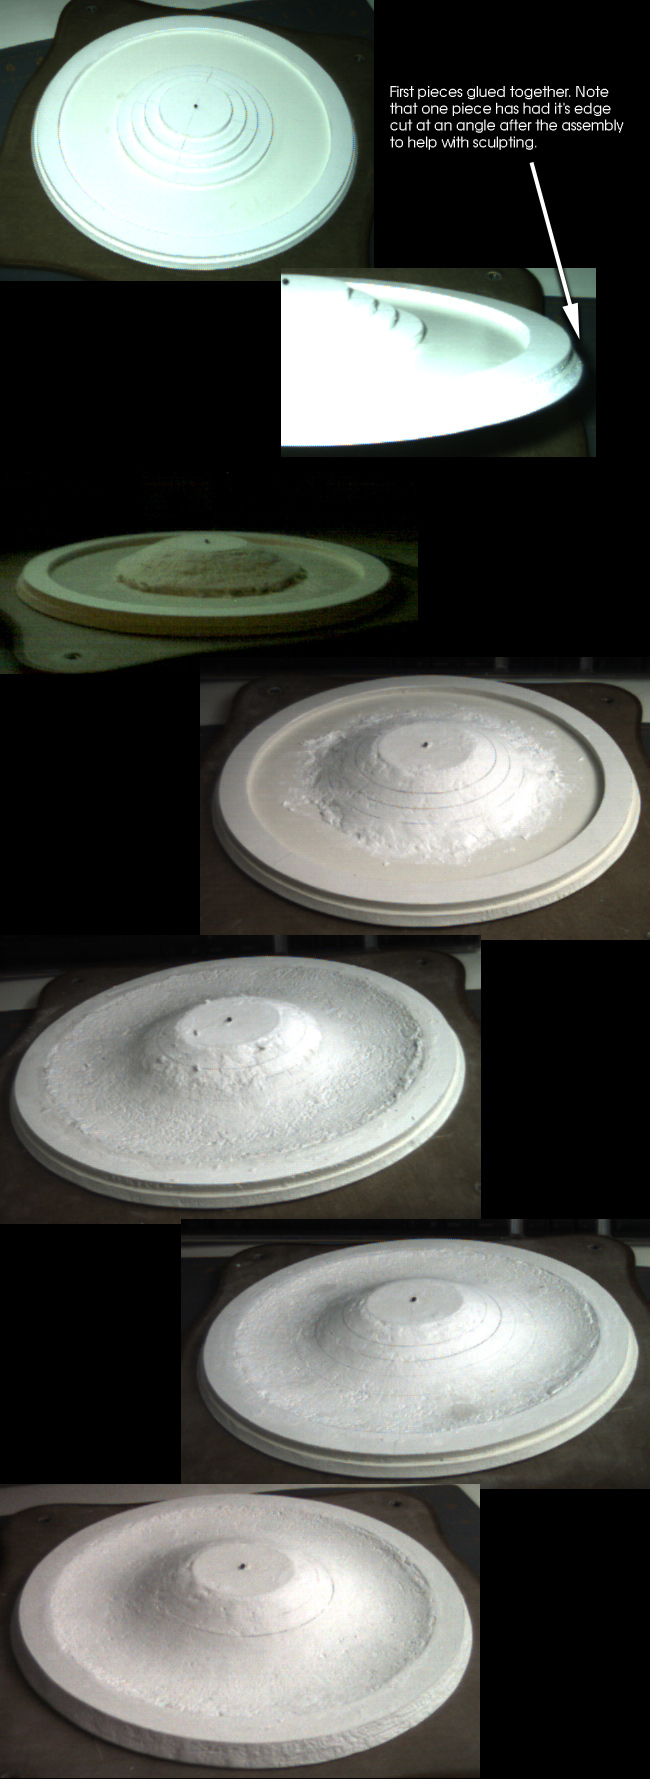
As seen in the images above, the process took a number of stages. And while this was essentially hand sculpting, I did use a curved section of plastic cut from a 2 liter Coke bottle to help make the final surface as smooth and uniform as possible.
Once I was relatively happy with the underside of the primary hull, I let it cure for a while before starting in on the top.
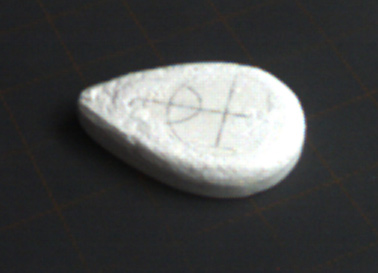
Because it was a separate piece, I started in on sculpting the B/C deck structure, which also started out as a couple pieces of foamcore board.
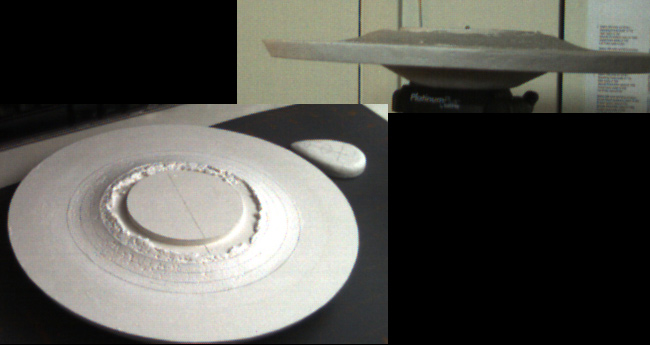
I was soon able to work on both the top of the primary hull and the B/C deck structure at the same time, again taking care to maintain symmetry during the build up.
The last two areas I worked on before purchasing an AMT/ERTL Cutaway Enterprise kit were the dorsal and the small box features for the front of the nacelles. The dorsal was made of foamcore board (like the first attempt), but this time I used a (round) pencil along the front and back edges to help in making the contours. The box features were made using a cardboard tube built up to the correct shape (the tube was the same diameter as the nacelles).
I found an inexpensive kit on ebay, which was in a badly damaged box and wasn't complete. Fortunately, the parts I need were there and in good condition.
I started by disassembling the secondary hull. The secondary hull of the kit is too short, and would need lengthening by 3/8th of an inch. This meant cutting off the from of the hull and cutting off the three box features in that area. As I was going to use my dorsal, it too needed to be cut off of the secondary hull.
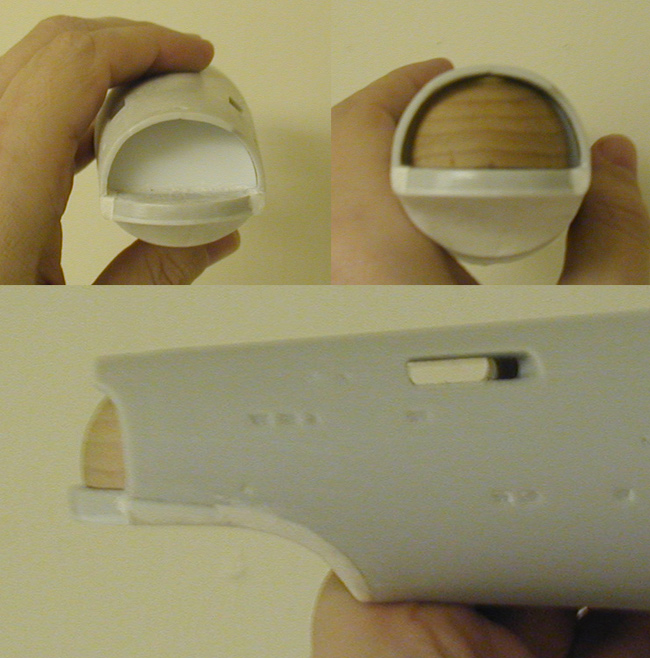
One of the biggest changes with this model from my previous one was the hangar doors and fantail. The kit version is far too short, so I cut off the hangar deck edge to start rebuilding that area. That back edge was not a bad shape, but it was too thin. So I thickened it using sheet styrene and then re-attached it in a lower position. from there I used that to re-sculpt the fantail/undercut. To replace the door I cut a wood sphere to the correct height/depth.
The inside of the secondary hull was also packed (over time) with Sculptamold to strengthen it. I found out with work on both models that after this stuff has cured fully, it becomes like cement. This started with packing it in behind the wall just forward of the hangar doors.
This wall feature was important because on the original model the hangar doors were lost, and I wasn't going to glue the doors on my model in so that I could replicate the later look of the original.
Once I had made significant progress on the aft area of the secondary hull, I started in on building up the front extension. The kit only has indents for the sides, so those were the only features I worried about. Where the bottom indent would have been, I added a mount for displaying the model. I used a paper hole punch to make the hole and the body of a pen for the inner channel.
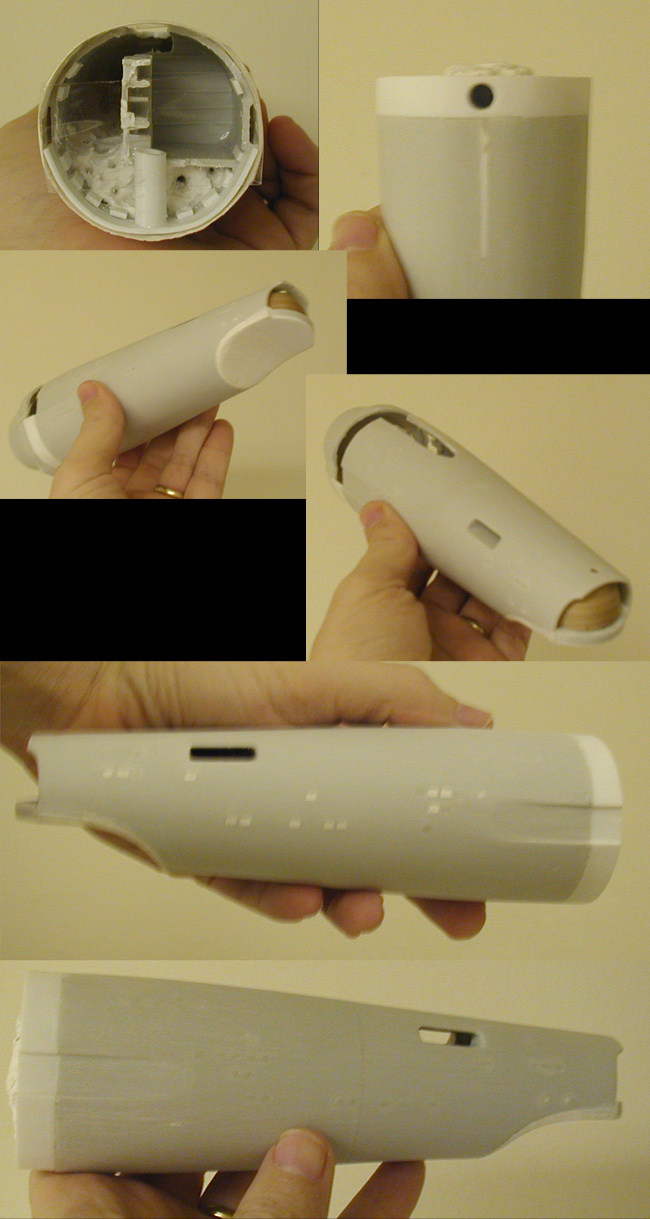
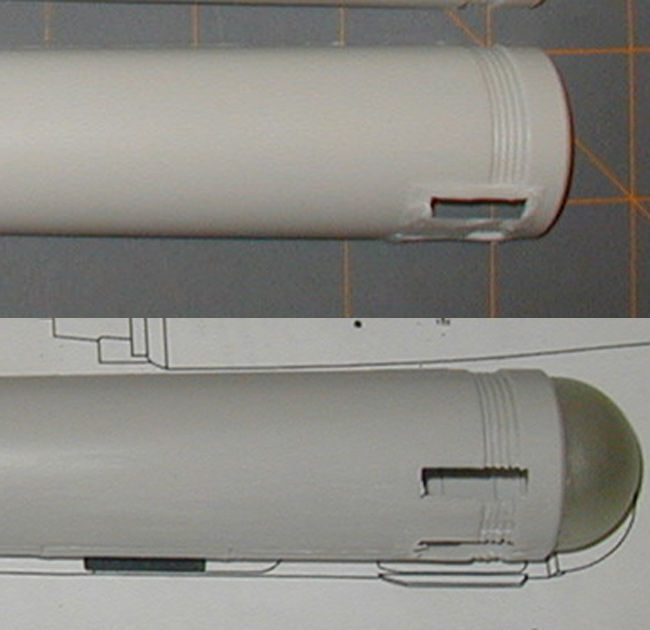
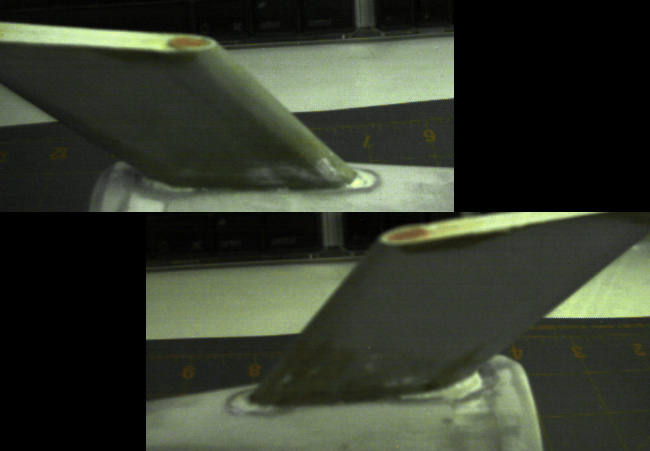
Starting in on the nacelles, the first step was to cut the support off of one of them (as the supports were going to attach at a different point than the kit had them at). The next was to cut off the end cap of the other (as I was going to reconstruct those myself) and start in on removing the forward box features.
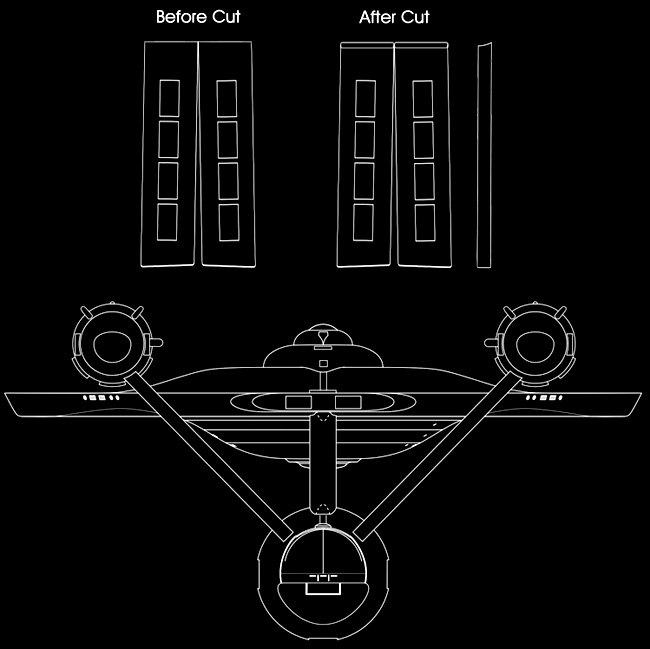
At this point came the hardest part of the nacelles (and a part of the build I considered skipping)... the extension of the inner channels towards the rear. On the original model, the channels actually meet the rear box features, and to have this on this model required extending them back more than a quarter of an inch.
What I did was I cut out the aft part of the channel, then cut out an additional section of the nacelle behind that, then glued the aft end of the channel back in.
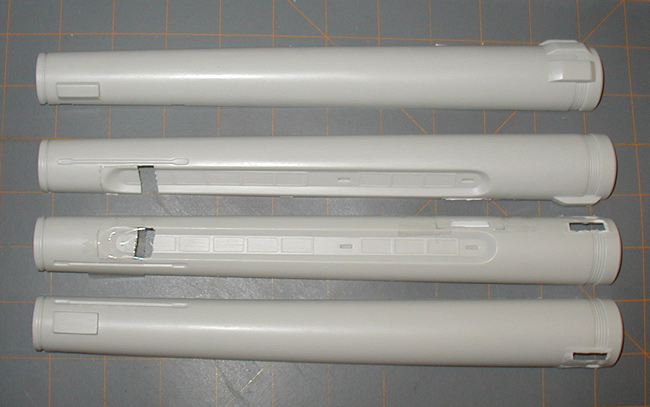
From there I used sheet styrene to fill in the gap left by the move.
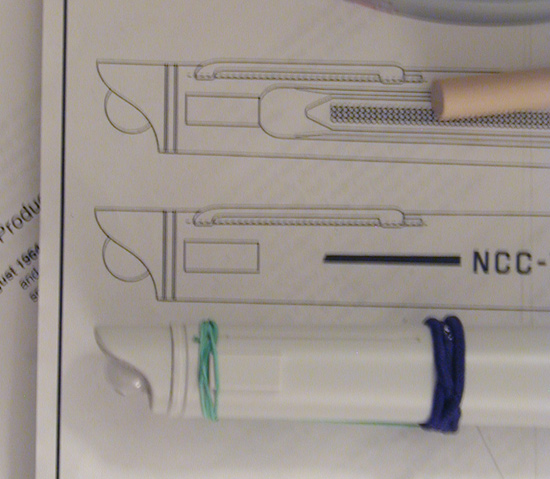
Additionally, removing the forward box features wasn't enough. Because the original features were too wide, I also had to extend the vents into the plastic.
For the rear end caps, because I had used Don's Light & Magic parts on the first attempt, I had two nice, whole end caps from the kit. The overall profile of the parts were correct, it was the hemispheres on the ends that were off. I cut these off those parts and substituted the front nacelle domes from a Polar Light's 1/1000 Enterprise. This turned out far better than I had expected.
By this point I was relatively happy with how the major pieces were shaping up compared to my plans.

While the overall shape of the primary hull was completed, there was still a lot of work needed on getting rid of surface imperfections. Fortunately, this time I dealt with most of them early enough that the fixes didn't require a lot of effort. I would be addressing minor imperfections throughout the remained of the build. And every so often I would take some time to do a test painting to see how the surface was turning out.
The next major step (and one that I worried about quite a bit) was adding features to the primary hull. Up to this point, the primary hull was symmetric about it's center axis... but the moment I started adding features, I needed to be sure that they were in all the right spots. And one major feature was to cut out the attachment point for the dorsal, which meant cutting away some of the surface I had worked to make.
One feature I had skipped on the first attempt was the marker lights on the primary hull and nacelles. On the original studio model these features were nonfunctioning and were meant to replicate the physical look of the larger 11 foot model. These were going to be static features on my model as well.
The solution I had come up with to make these features was the heads of sewing pins. The standard all metal pins were used for the lights on the nacelles and pins with beads for heads were used for the lights on the primary hull. I punched small holes where they would go and glued them into place. Once the original gluing had cured, I added a bead of glued to the top of each pin head which settled in and filled in the underside gaps.
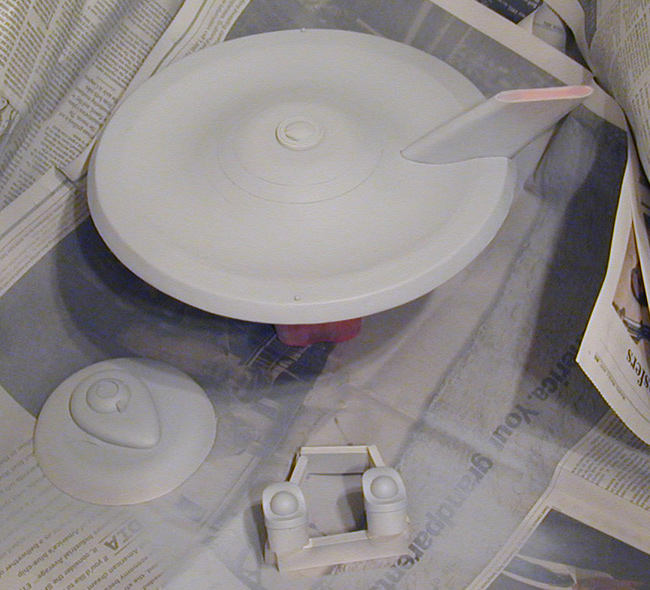
This is how the primary hull was shaping up at this point (the B/C deck, lower dome and dorsal are just set in place for the photos)...
By this point the DLM parts had arrived and I cut a hole into the top of the B/C deck structure for the bridge to fit into. After that I did another round of priming of those parts (including the rear nacelle caps) to see how they were progressing.
Another aspect of the nacelles that was being worked on at this point was the filling in of the original attachment points and the making of new ones. The new attachment points were made of a thick gauge paper clip wire bent into a squared off "U" shape with the ends extending out of the nacelles through holes.
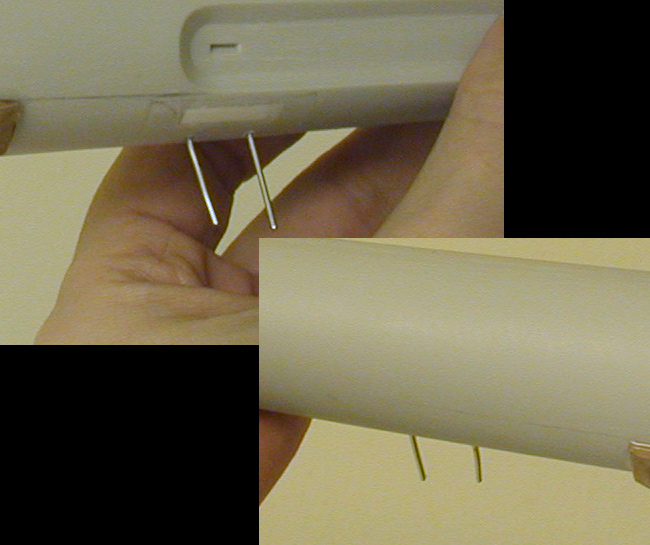
I also used paper clip wire to reenforce the supports by gluing the wire to the inside walls. After the supports were assembled the tops needed to be cut off to match the new attachment angles.
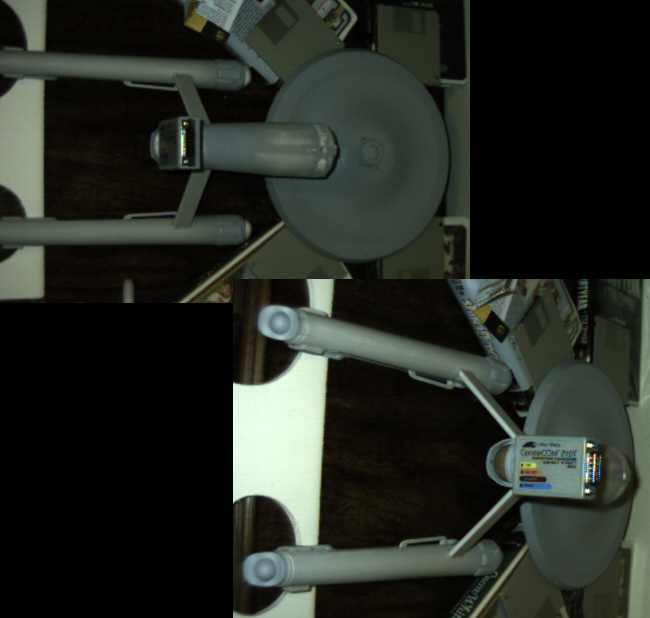
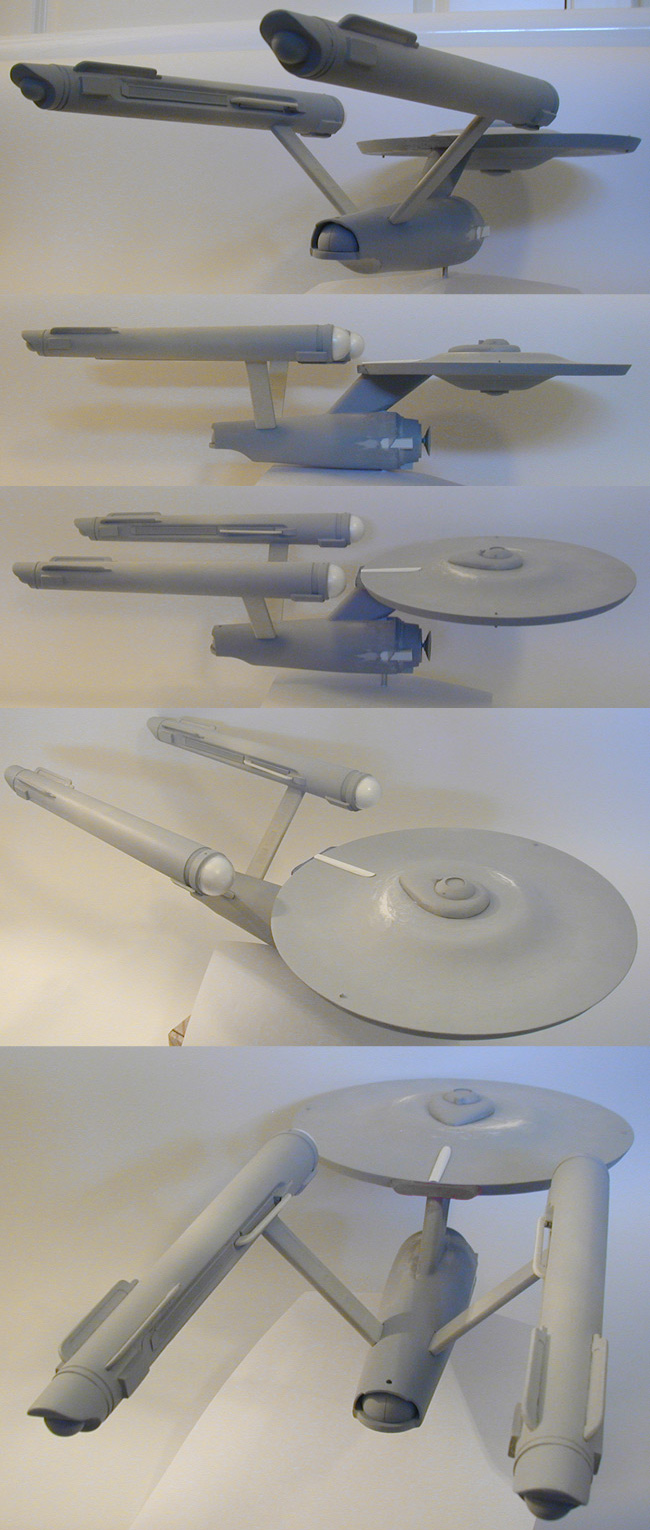
At this point enough of the major elements were completed to do test assemblies of the whole model. The nacelles are held in place with a single rubber band, most everything else is just sitting in place.
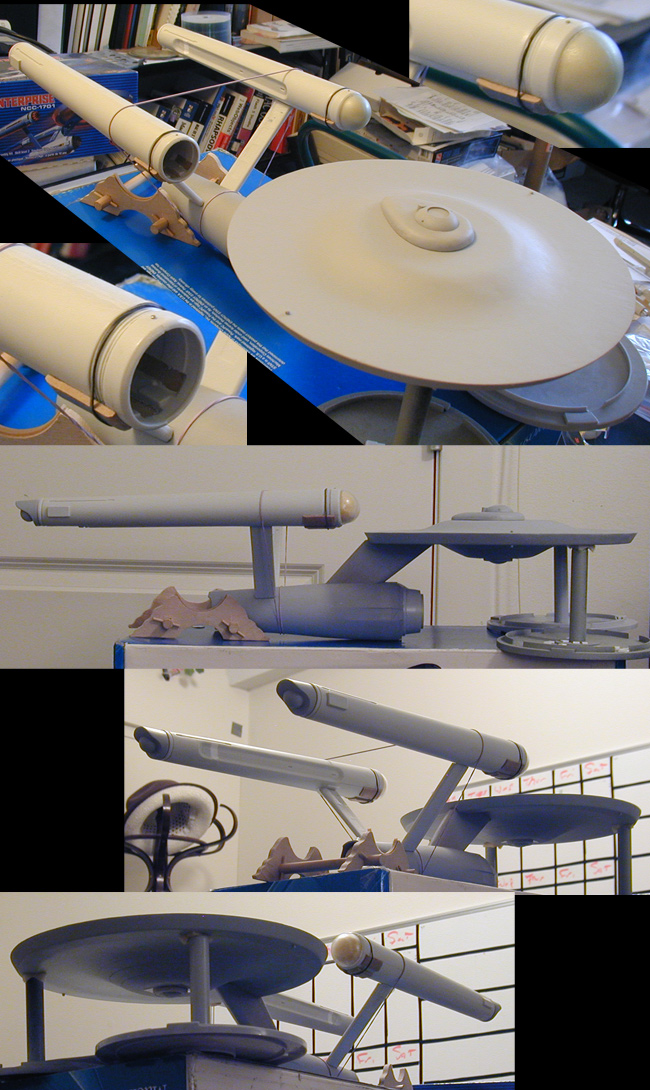
Next I glued the forward nacelle box elements I made onto the model, and the did a test painting over the front of the nacelles to see how well they worked.
From there I took the next major step, attaching the dorsal to the secondary hull. The dorsal still wasn't glued to the primary hull, it was held in place by the snugness of the fit.
While test fitting, I marked off on the dorsal where the edge of the secondary hull came to on it. I then inserted pins into the dorsal blow that line and extending out by about an 1/8 of inch. I reinserted the dorsal and glued it in a number of spots where the secondary hull touch the dorsal.
Once the glue had cured, I started packing in around the dorsal's base inside the secondary hull with Sculptamold. The idea is that the Sculptamold would set in around the extended pins locking the dorsal in place even under stress. I did this over a number of steps to letting the Sculptamold cure somewhat in between. The last step was packing in any remaining gaps around the dorsal at the secondary hull's surface.
After finishing up with most of the nacelle detail parts I got the model ready to attach the nacelles to the supports. The most important aspect of this was patience. Once in position and glued together, I let the model sit for four days to let the glue cure as much as possible.
I then took a few minutes to see if the model was aligned correctly...
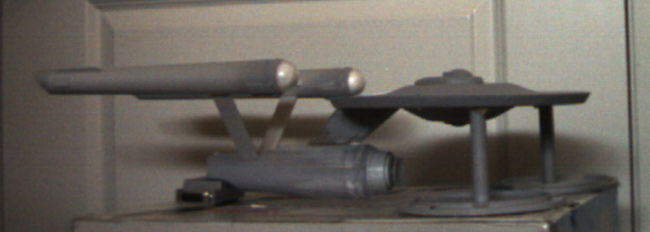
... and then removed the nacelles/supports from the secondary hull and let them set for another week on their own before letting the attachment points attempt to hold the nacelles for any extended period.
When I was sure that most everything inside the secondary hull had cured, I glued the front on and put back the three box features I had cut off earlier.
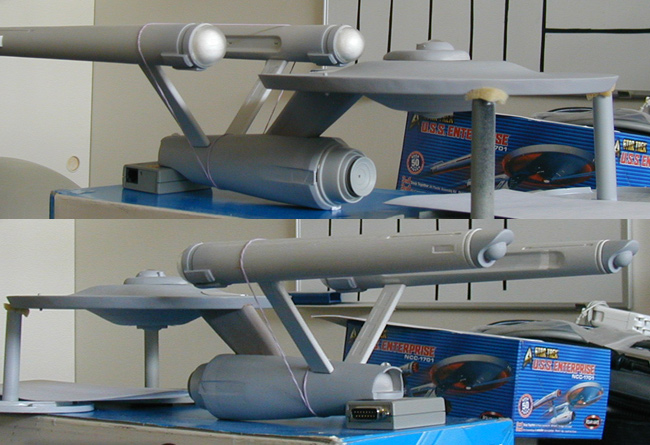
Once I was fully confident in the nacelles and their supports, I glued the primary hull the the dorsal and secondary hull. It was important that the nacelles/supports were in place so I could make sure that everything was properly aligned.
After another period of waiting (four or five days) I finally let the model stand fully on it's own.
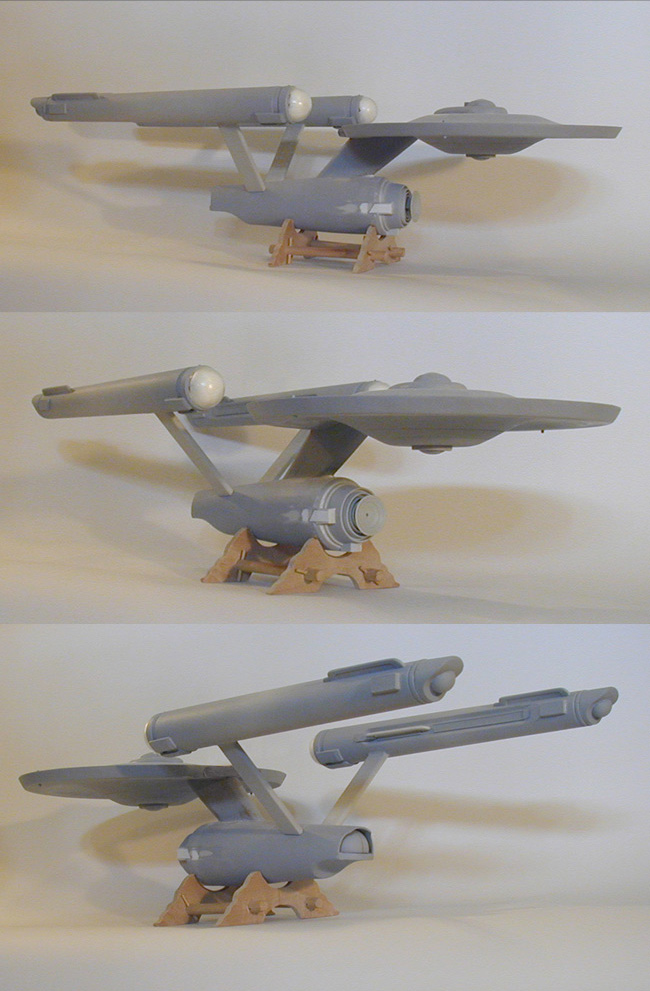
By this point I was relatively happy with the surface of the primary hull and took the additional steps of gluing the remaining elements to it. This included the lower dome, the bridge/B/C decks, the impulse engines and the spine.
At this point I took some time to review everything. I wanted to make sure that I had completed everything I needed to before I started in on the actual final painting of the model.
- to be continued -
(I'll eventually be returning to finish this page)
|
