|
|
|
|

This page covers the construction of my model of the Federation scout USS Columbia. This scratch built model is an offshoot of my one-sixth studio scale USS Enterprise (the 11 foot model) project. I wanted to test some aspects of building/painting/finishing without the pressure of matching a pre-existing studio model.InspirationIn the mid 70s my friends and I would play Star Trek, but we had a rule... no one could command the Enterprise. So we each picked a different ship from the Technical Manual, kit-bashed a model of our own ship (no one picked a heavy cruiser) and designed our own insignia. I had picked the scout Columbia, which was cool as when we all saw Star Trek: The Motion Picture we heard it in the background communication chatter, and later the first Space Shuttle was named Columbia. And back in 2006 when teaching myself CG modeling, my first attempt was a model of the Columbia. I wanted to add something to the model that would make her unique, and I remembered that one of the features of the Space Shuttle Columbia was a sensor pod on the top of her tail fin. 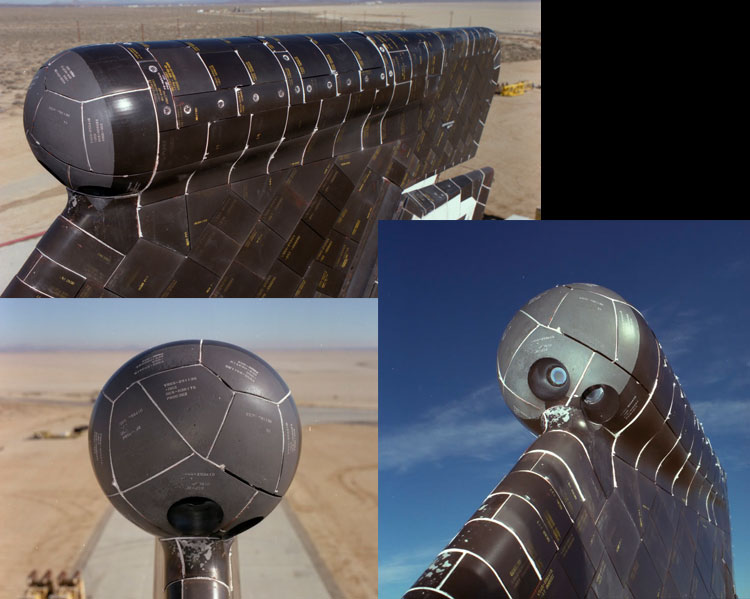 And while playing with ways to use that idea I also recalled one of my favorite variations on an early design of the USS Voyager which included sensor masts on the top and bottom. 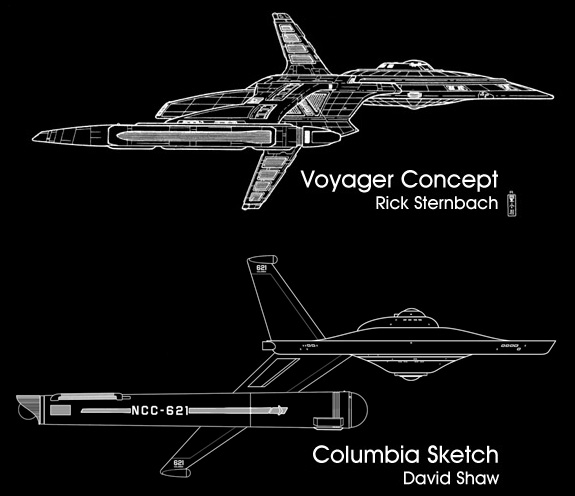 This wasn't meant to be a redesign of the scout class, it was more of an experimental deployment of new technology. This would be like how the Spruance-class destroyer USS Arthur W Radford (DD-968) had her rear mast replaced with an experimental enclosed advanced sensor mast... which was never added to any other destroyer of her class. 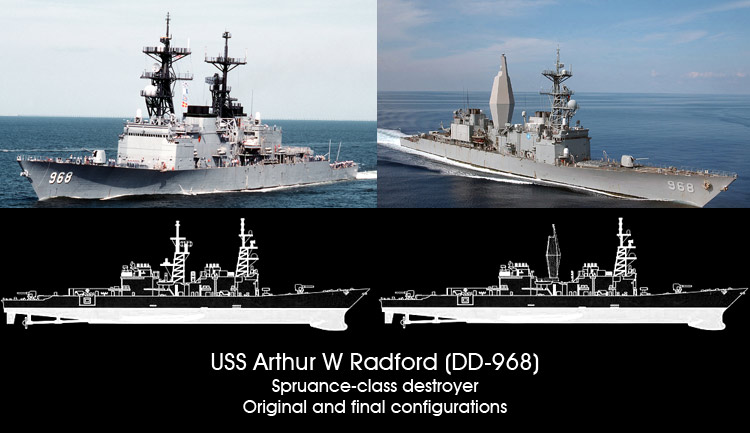 Plus I sorta wanted this model to be a contemporary design with my Phase II Enterprise (as both are 1/500th scale), while not using things like the newer nacelle design. Getting StartedI'm going to include the relevant parts of my Enterprise build here... specially as I'm not sure when I might get back to that one. I started out by building the boxes on which I would make the masters for the upper and lower primary hull. I then started adding elements of foamcore board to begin the shapes. 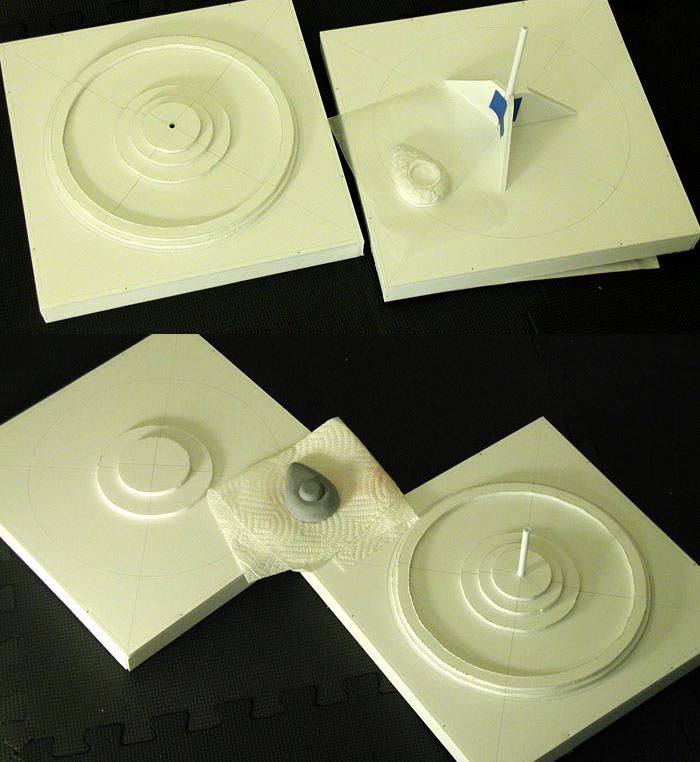 I also began on sculpting the bridge/B/C deck structure starting with a general shape made of foamcore board levels and then adding on AMACO Sculptamold (cellulose-based paper mache') to build up the shape. 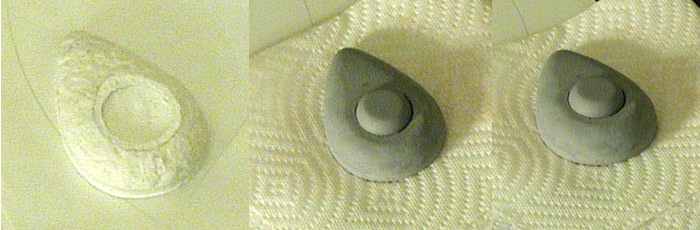 I made that master taller because it needed to hang over the plateau on the upper primary hull in the back. To check that the shape looked right, I tested it by putting it back in the foamcore board that I cut out the earlier pieces from. 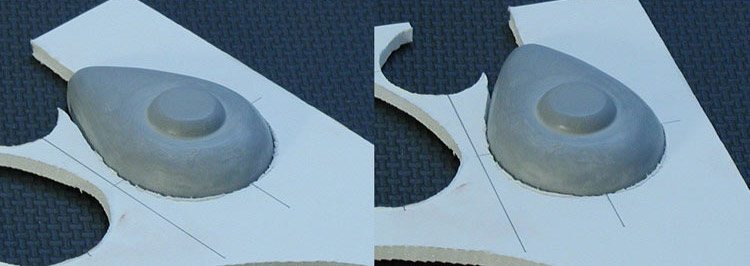 Turning the large surfaces is done in a number of steps, letting the plaster harden enough to hold the general shape as I build it up in each successive application. 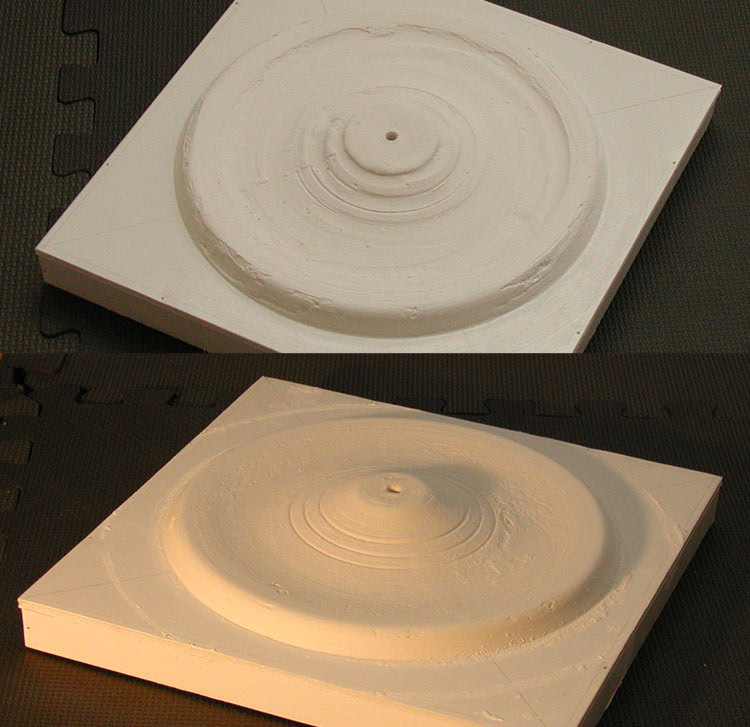 Once I get a pretty good shape, I let the plaster harden fully. I do a light sanding and then brush on a watered down mixture of Elmer's glue to act as a glaze. 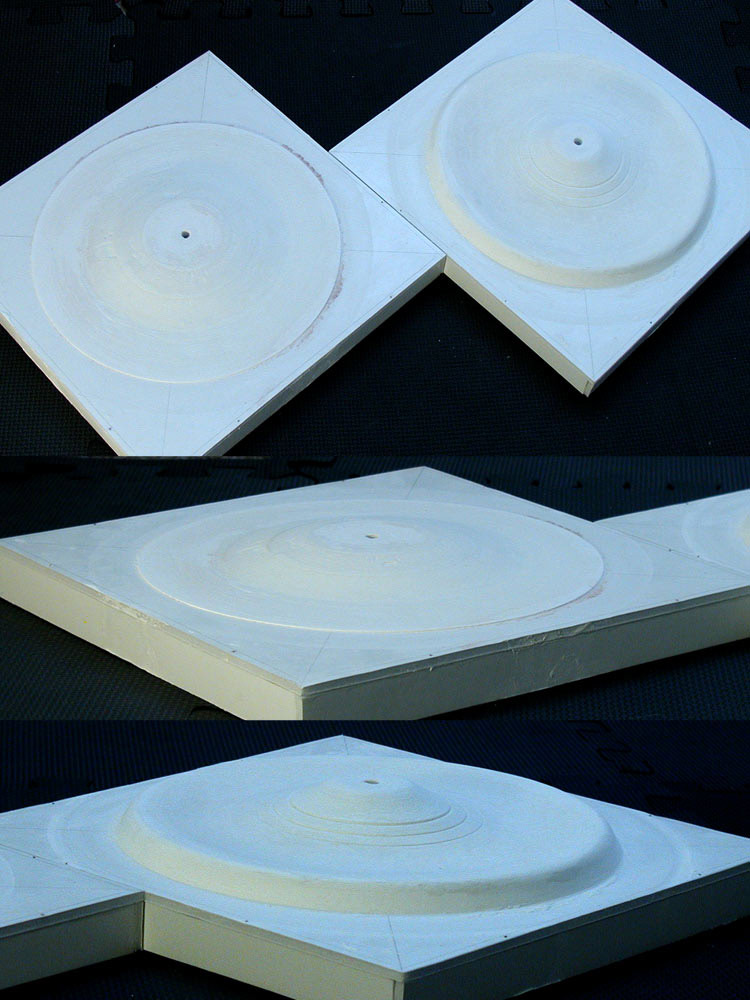 Once that has completely dried, I hit everything with a coat of Rust-oleum Automotive Primer to see where I'm at. 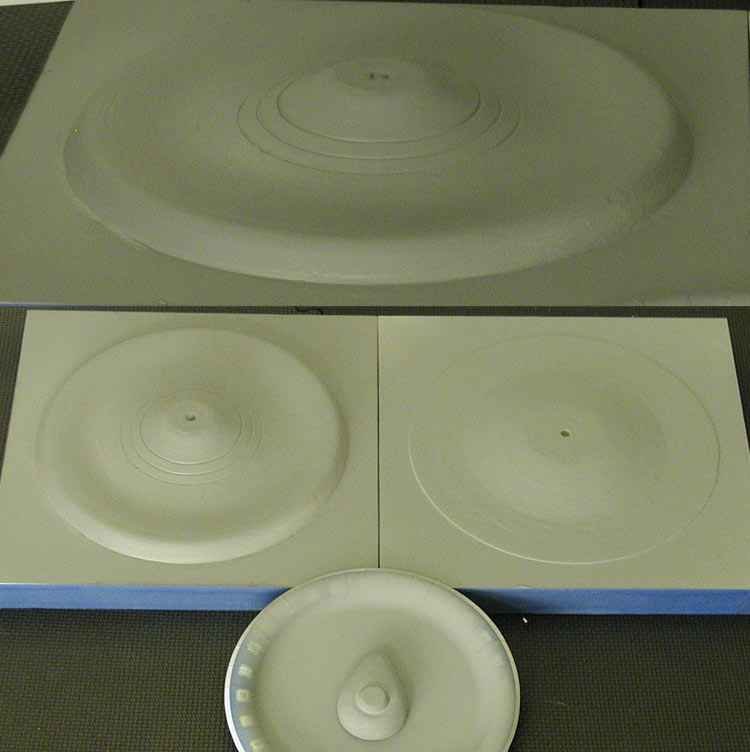 I then go over the surface with Bondo Glazing & Spot Putty to fill in the flaws, while also using the turning templates to make sure I'm retaining the correct contours. 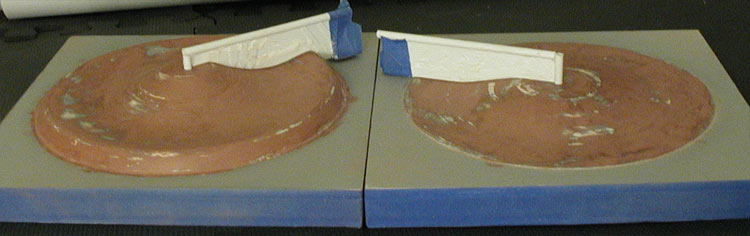 And this is what the underside of the boxes look like... 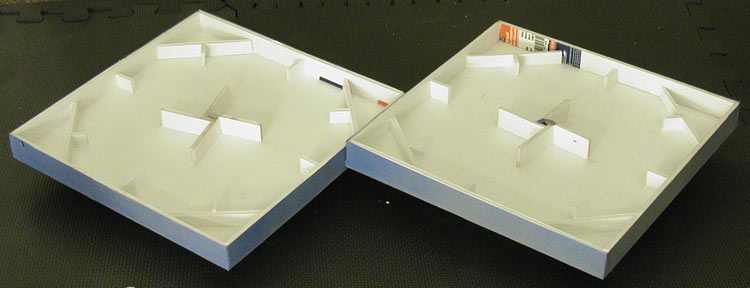 Once I felt like the surfaces were smooth enough, I started adding on additional details. 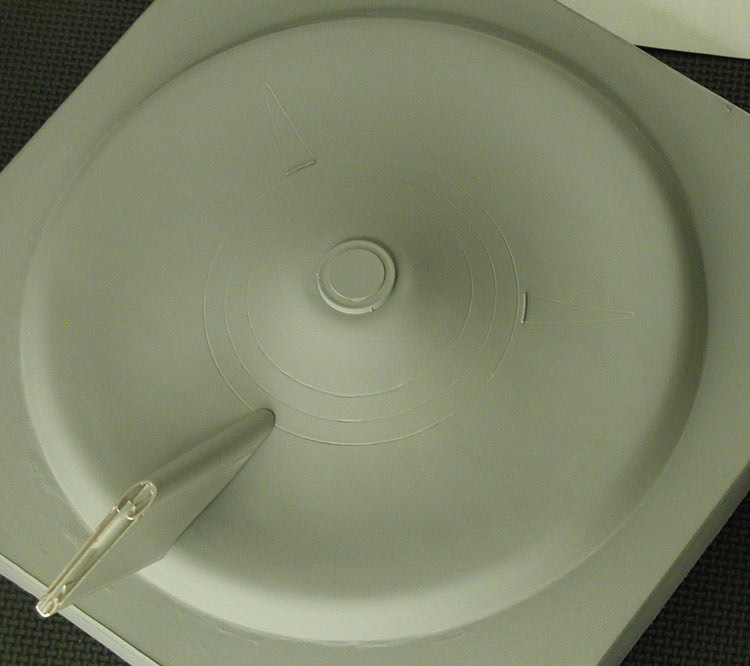 With all that done, I built up the containment boxes for the silicon rubber. The boxes along with plaster and burlap cloth would make the solid structure that the final silicon mold would sit in. 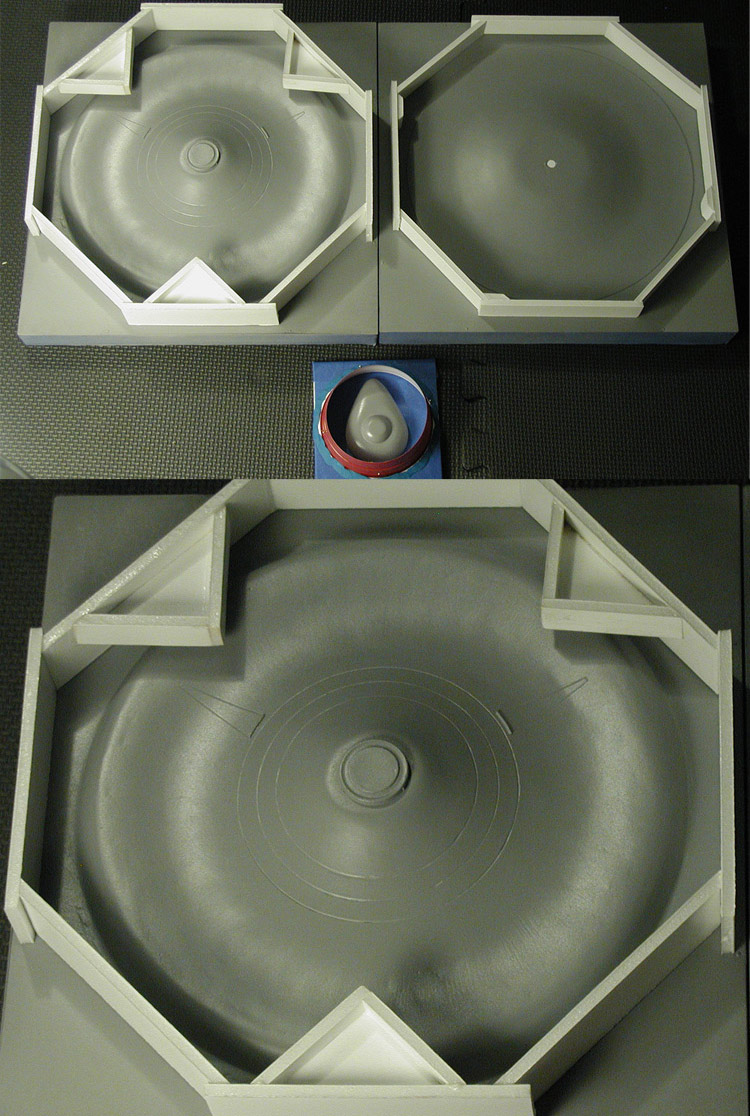 I attached the containment boxes to the masters using clay to keep the silicon rubber from running out. 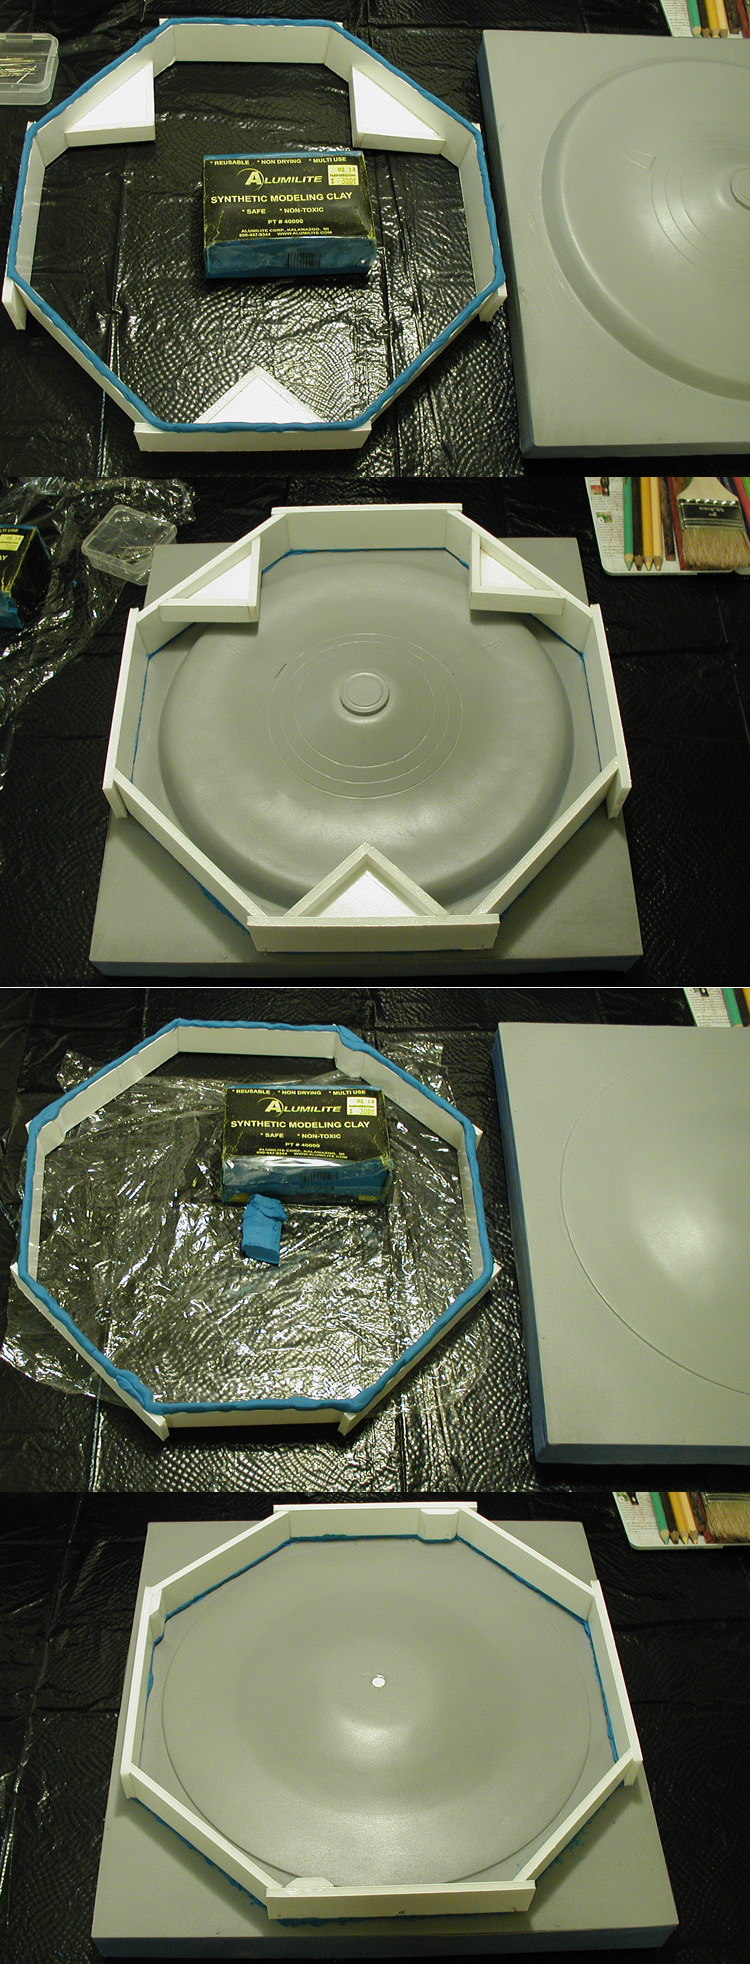 And the final molds came out great! 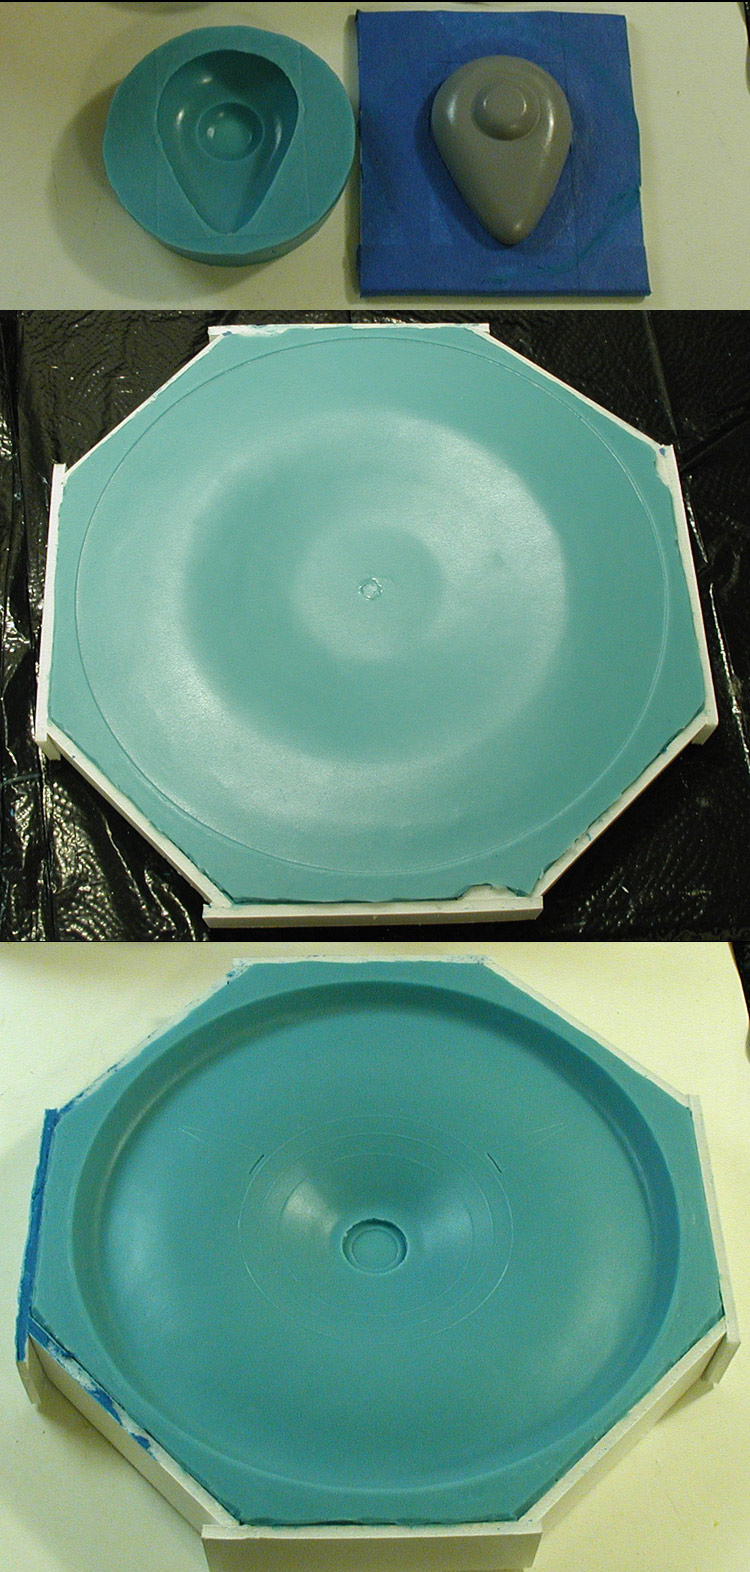 Nacelle ElementsI started out building the master for the rear end caps. I first built a frame that I could wrap ribbed styrene around. 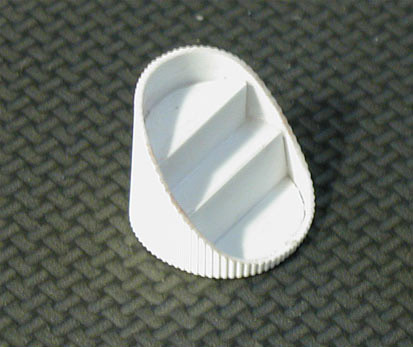 This is a test with the hemisphere set in place. 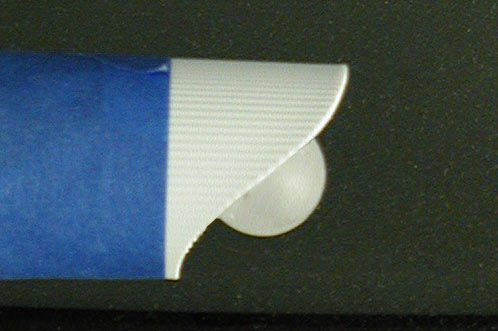 I filled the voids first with Sculptamold, and then with putty. This is another test with the hemisphere set in place. 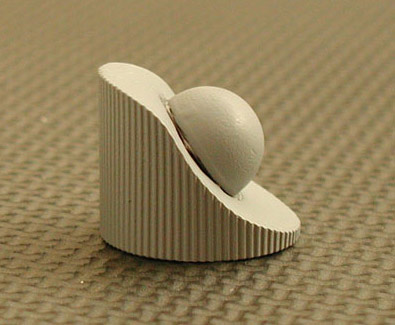 When starting on the front of the nacelles, I had gotten some wooden spheres to use as masters for the dome and built the rest of the parts to fit. The rings started out as thin styrene disks at the diameter of the forward nacelle with thicker styrene disks of a smaller diameter glued to the backs. 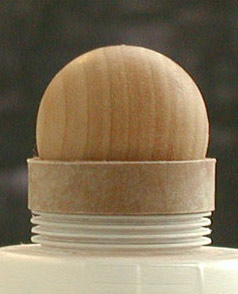 Because this was intended for the Enterprise (which has two nacelles), I made the molds for the domes using more than one wooden sphere. I knew I was going to cast them in tented clear resin, and to avoid having the domes look different I wanted to use the same resin/color mixture for both (and maybe a spare or two). I continued to work out the details on the rest of the master, including puttying between the two disks used for each ring and sanding to get the correct shape for each.  I continued to work on the detailing of both the rear end cap and forward nacelle masters, refining their shapes. I added the ring forward of the end cap along with a cylinder that would help mate the part to the nacelle body later on.  This is a test of some of the rear elements on a nacelle body mock-up. 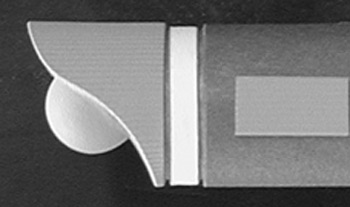 Once happy with the shape of those masters, I was ready to make molds from them. I wanted to make sure that the forward nacelle master was going to work with the domes (as I hadn't cut any of the wooden spheres down to hemispheres), so I did a test casting of the domes. 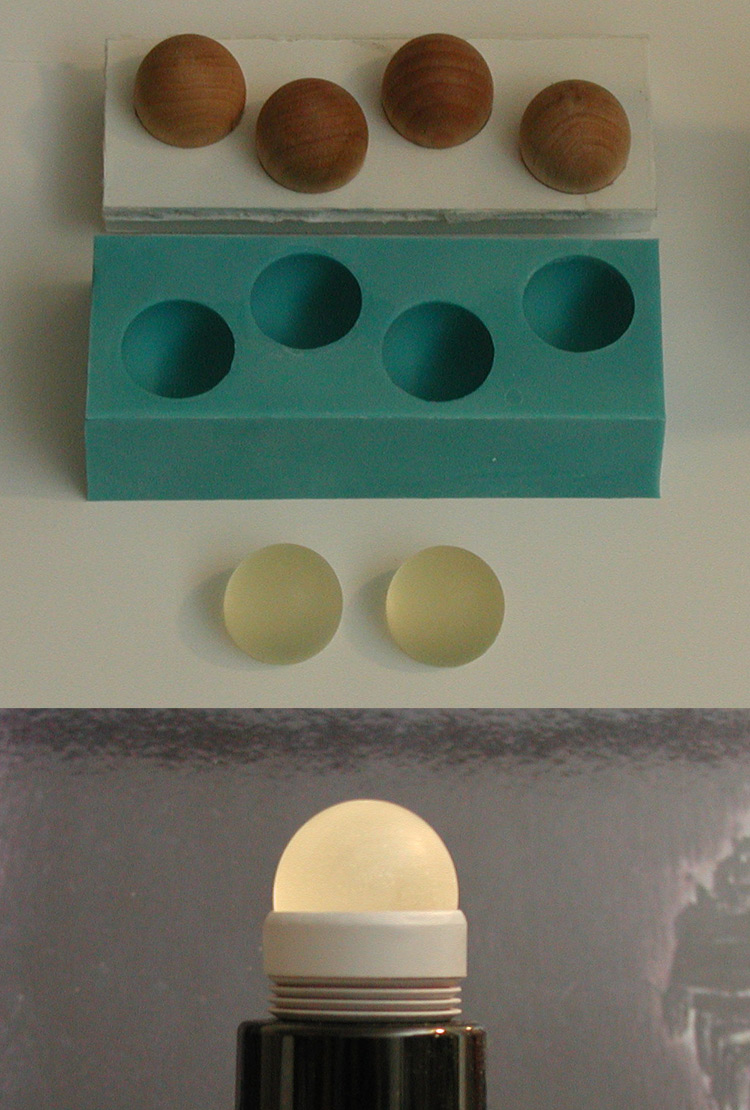 With that I made molds of the rear cap and forward masters. This was the first couple parts I pulled from them. 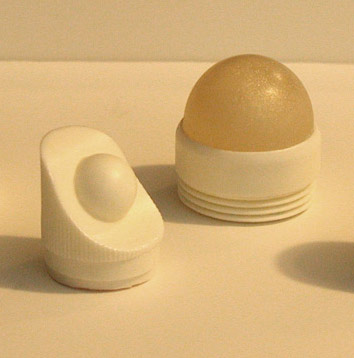 The last part needed was the intercooler loop. I built it up with levels of styrene which I rounded off. Once I had the correct shape I added the rib features using pencil lead from a mechanical pencil. Here is a test with all the rear elements together. 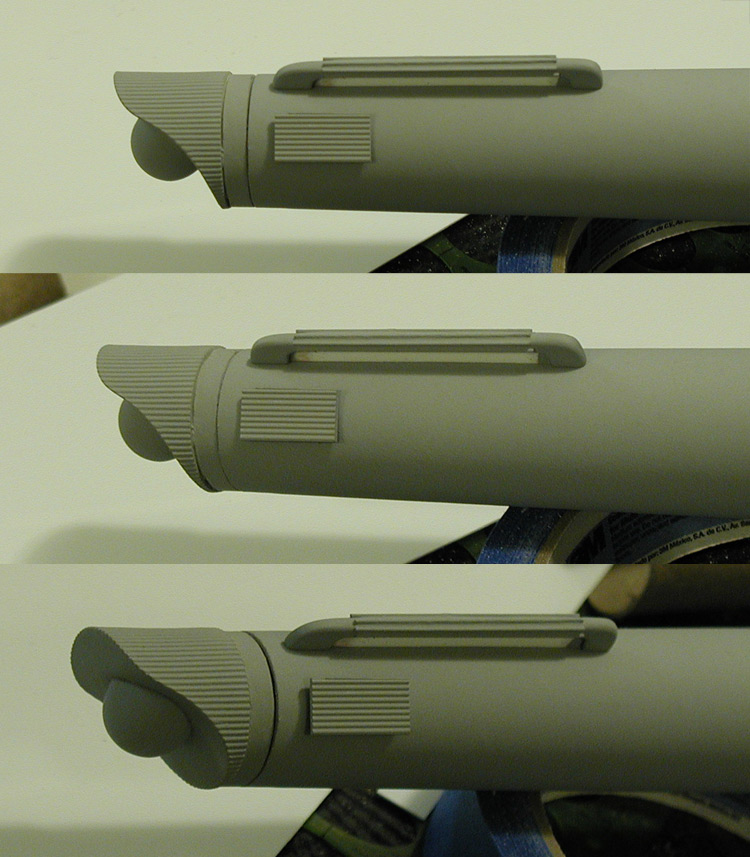 Putting it all togetherAfter casting the primary hull parts, I was still not totally sure of the design. Originally I considered having the nacelle channel rotated towards the bottom (like a normal scout design) and only including the upper mast. But the more I played with the idea (using foamcore board stand-ins for the masts and dorsal pylon) the more I realized how much I liked the inclusion of the lower mast. Here are some early test assemblies without the lower mast and including the start of the channel on the underside of the nacelle body. 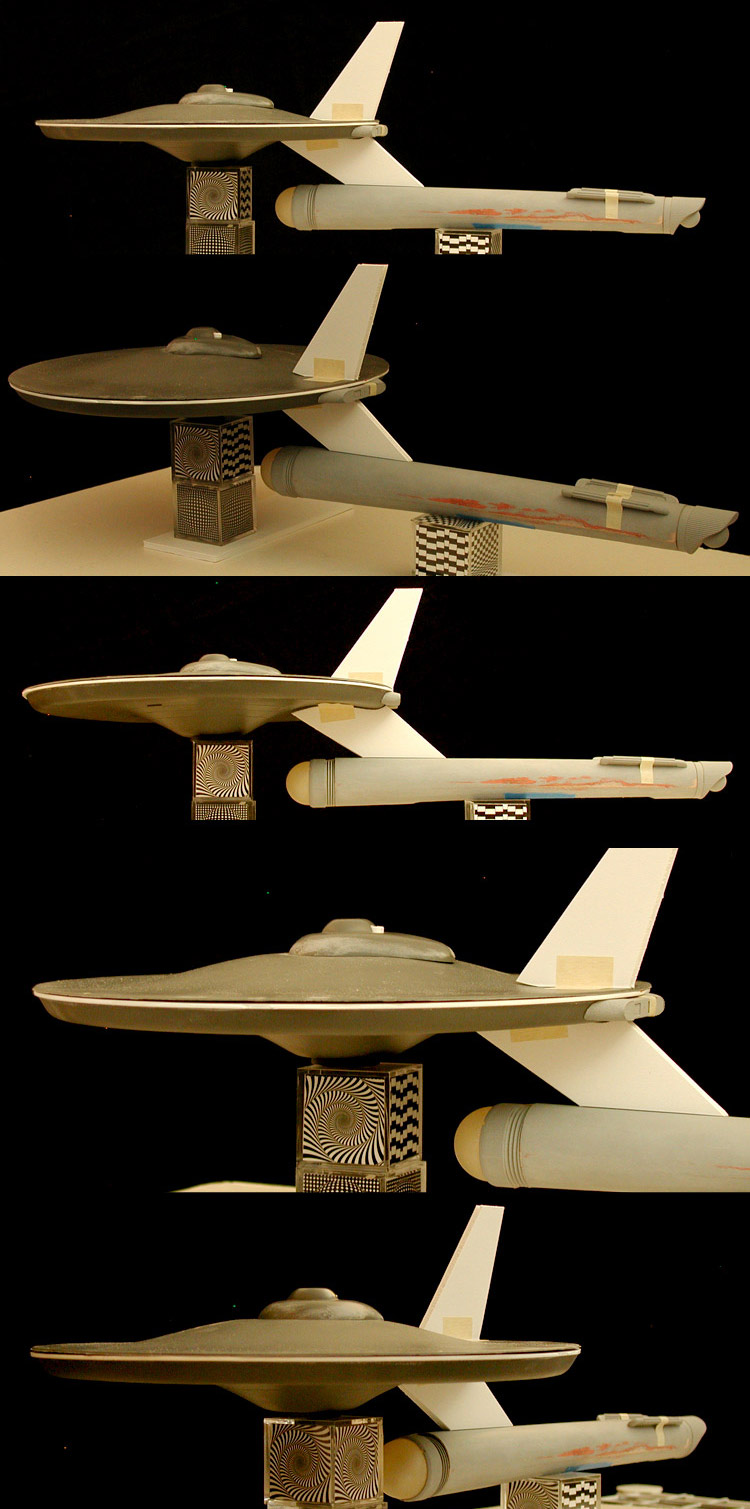 This is the first primer pass after bringing the primary hull parts together and puttying the seams.  And test assembly, again using foamcore board stand-ins. 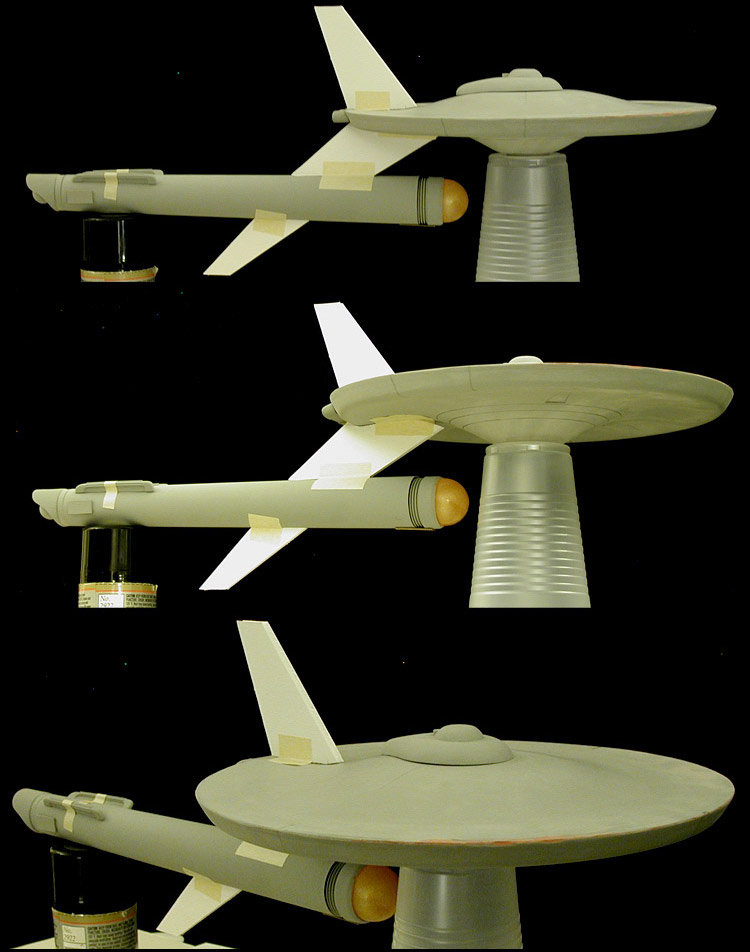 I made the dorsal pylon and the lower mast a single piece. It started out as the general shape cut from styrene. I added styrene tubes to the front and rear of the dorsal part (the front one being wider), and a tube to the front of the lower mast (made of the same, narrower tube as the back of the dorsal). The masts were to have rounded fronts, tapering to narrow flat rear edges (looking almost like a wing). The side panels on the dorsal included an opening with ribbed styrene behind it to make the vent feature. Here is my progress on that element (with the first nacelle body being used as a stand-in). 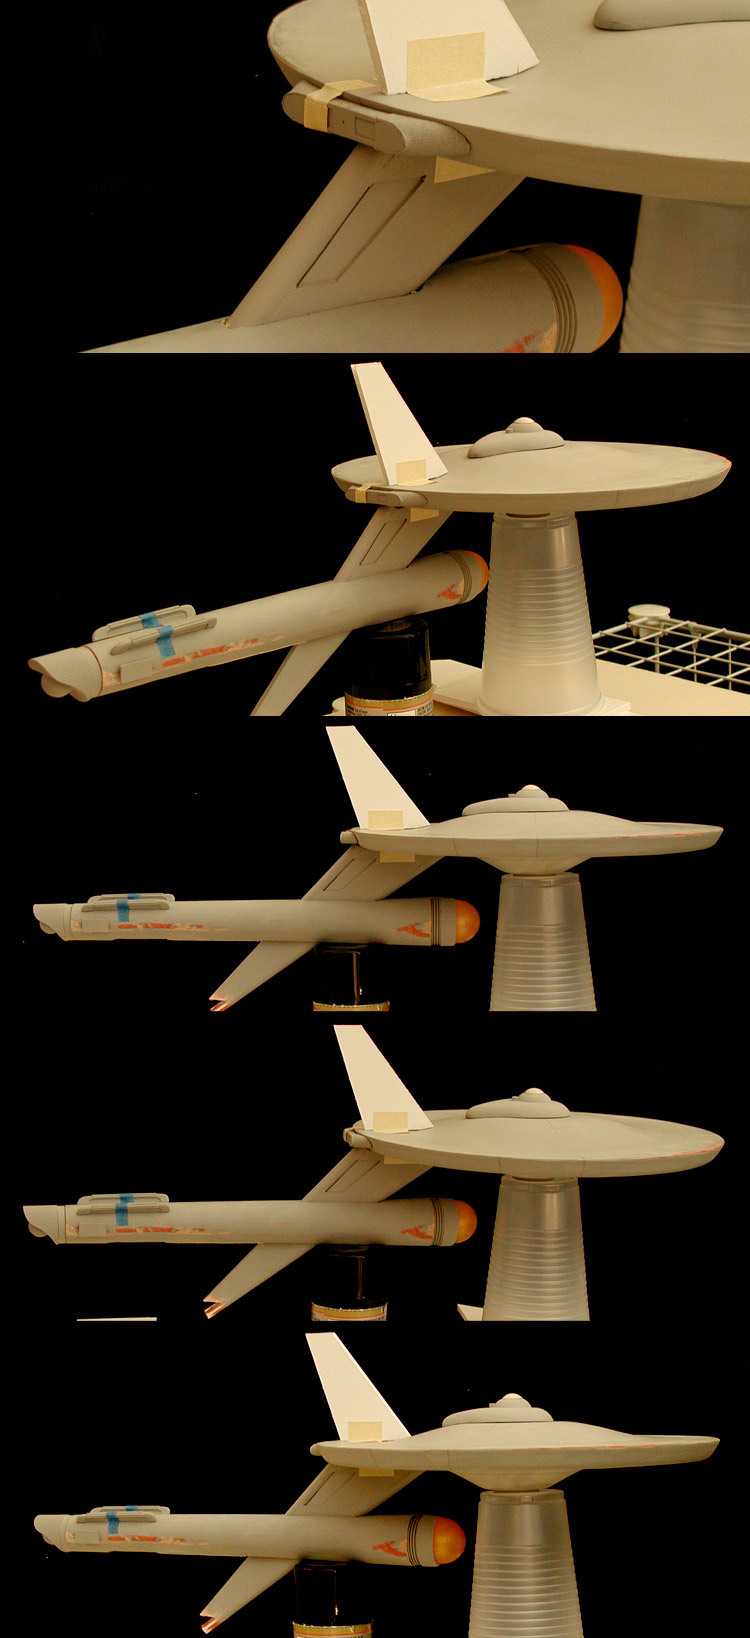 I then started on the upper mast, mirroring the construction of the lower mast element. In both cases I left the ends unfinished as I was still trying to work out the design of the sensor pods. 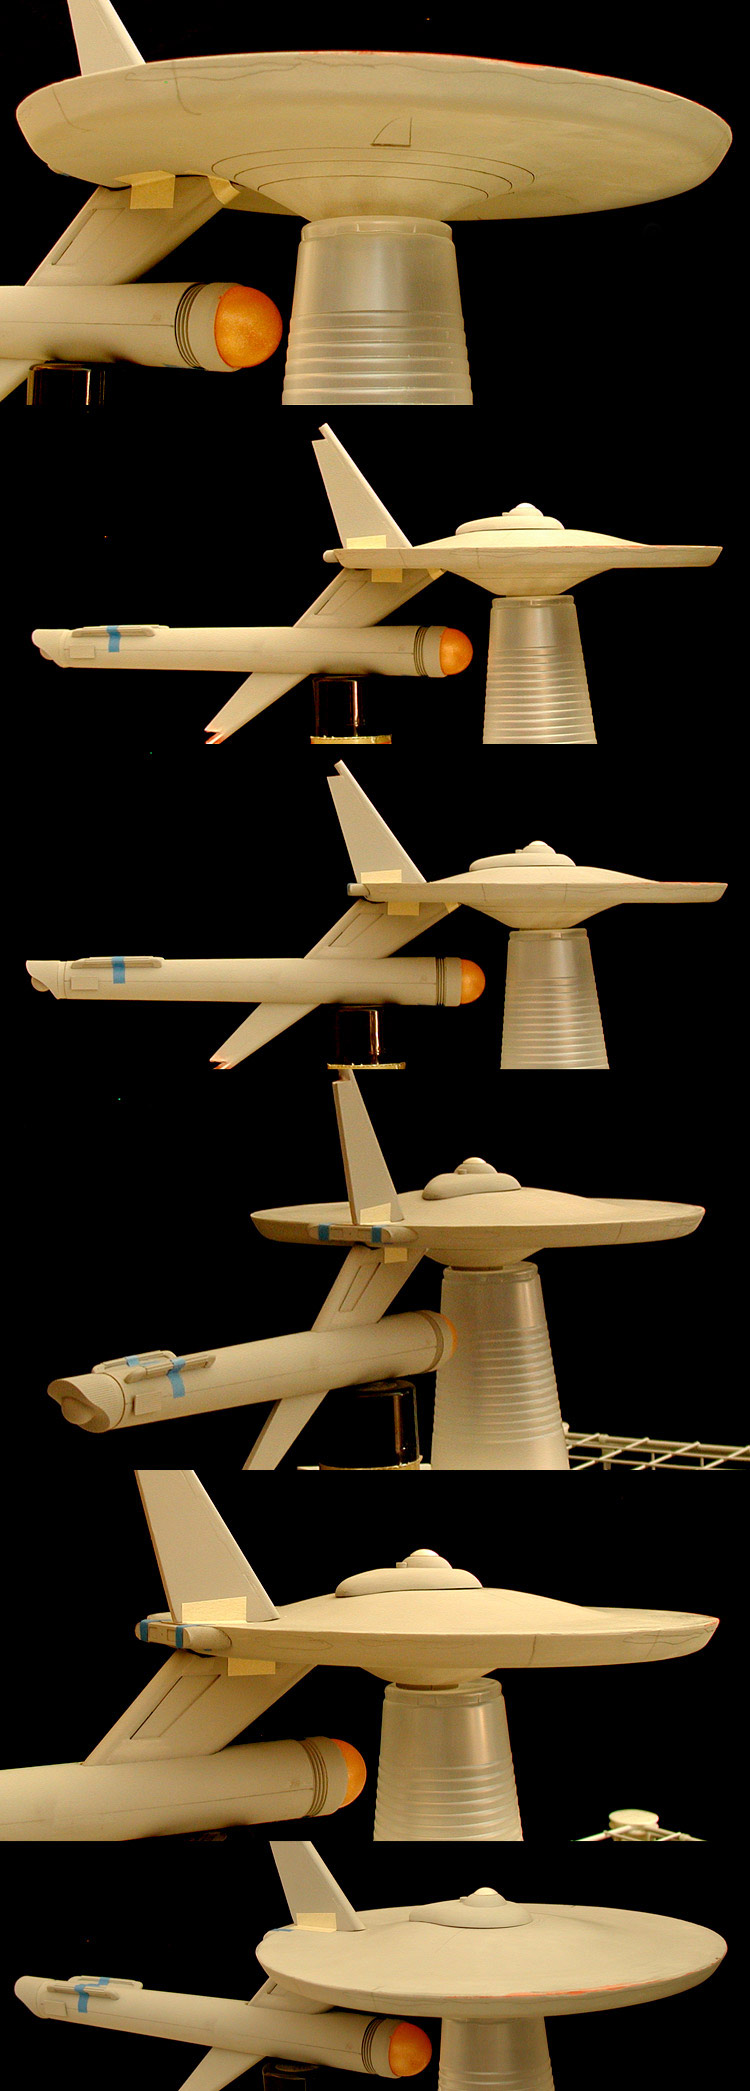 At this stage I started pulling the dorsal-nacelle-lower mast elements together.  Here is a test assembly to see how everything was working together. 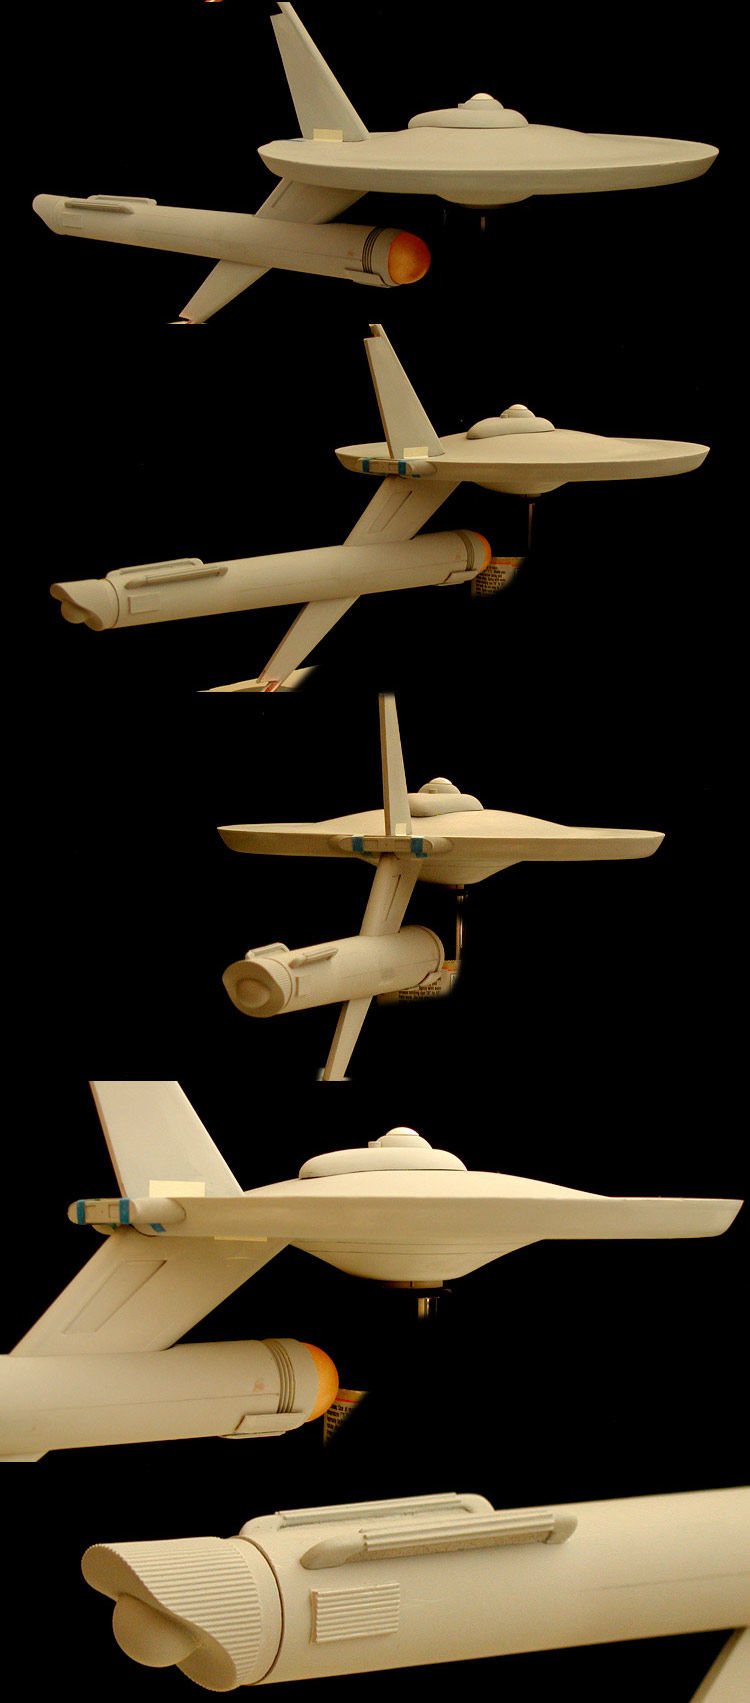 Once I had finalized the sensor pod design, I finished the assembly of the lower elements. This included building in a mounting point for the display stand. 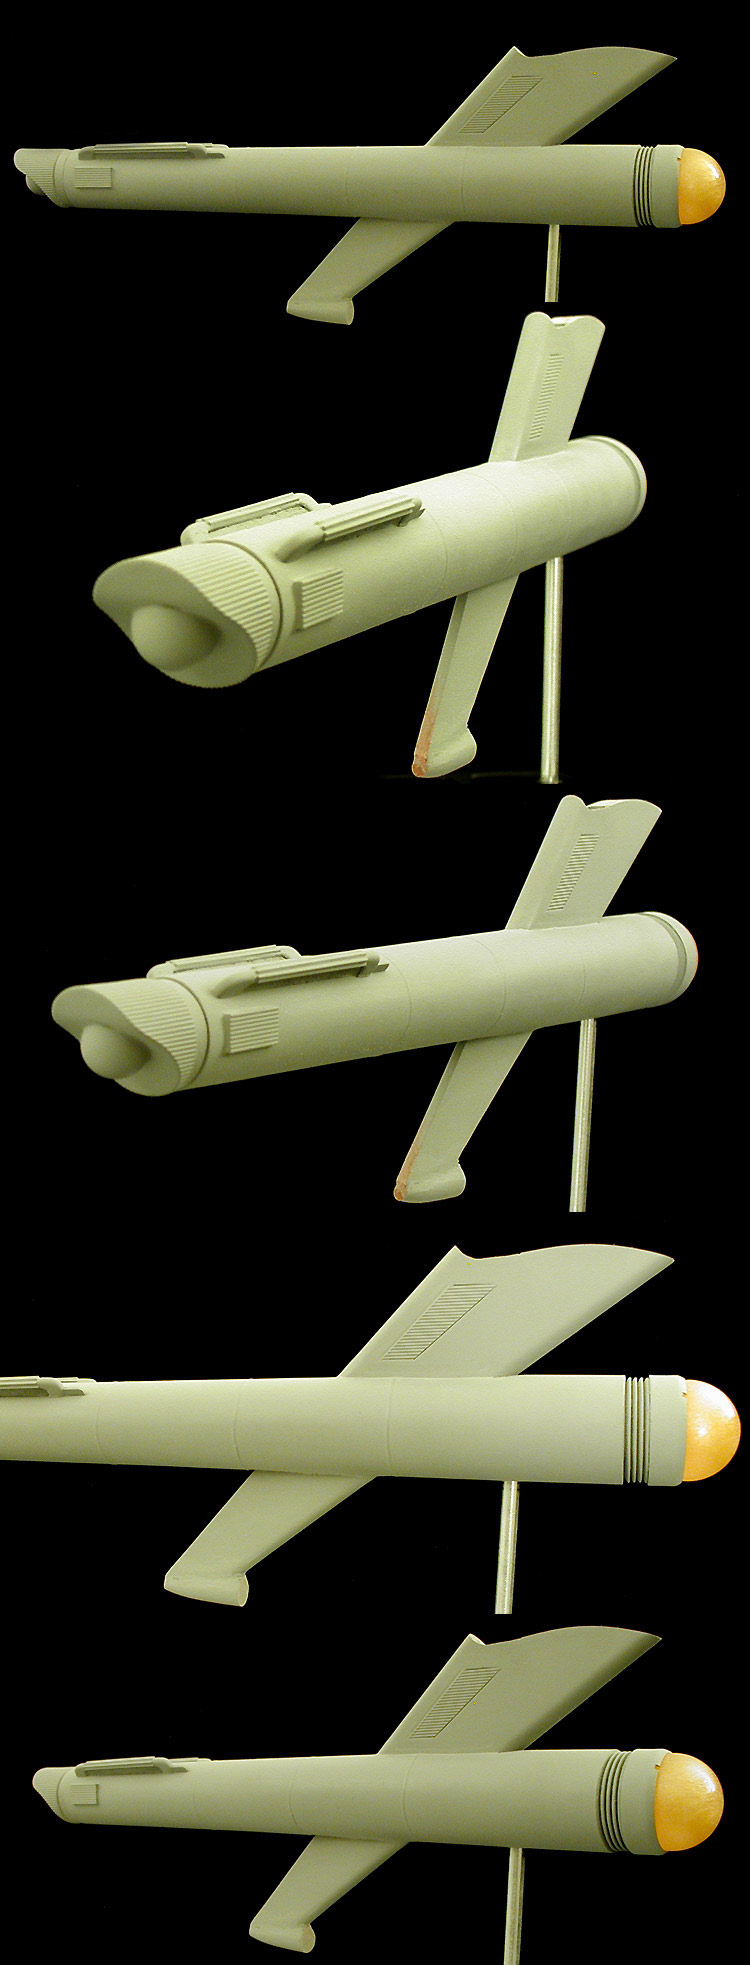 With all the key assemblies finished, it was time to start painting the model. 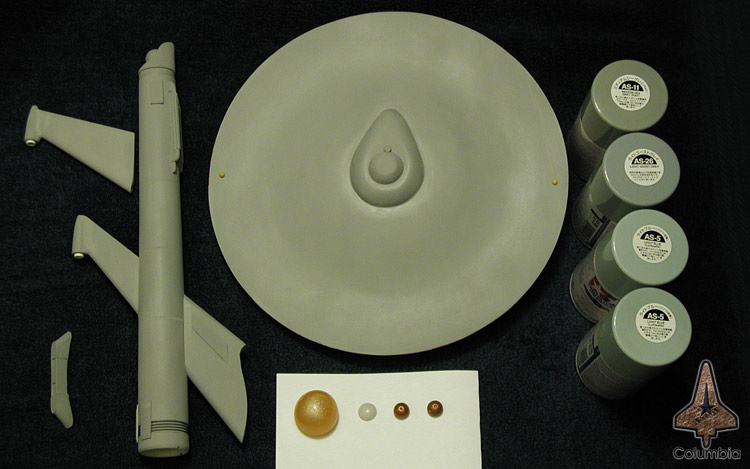 Once the painting was finished, I added weathering. 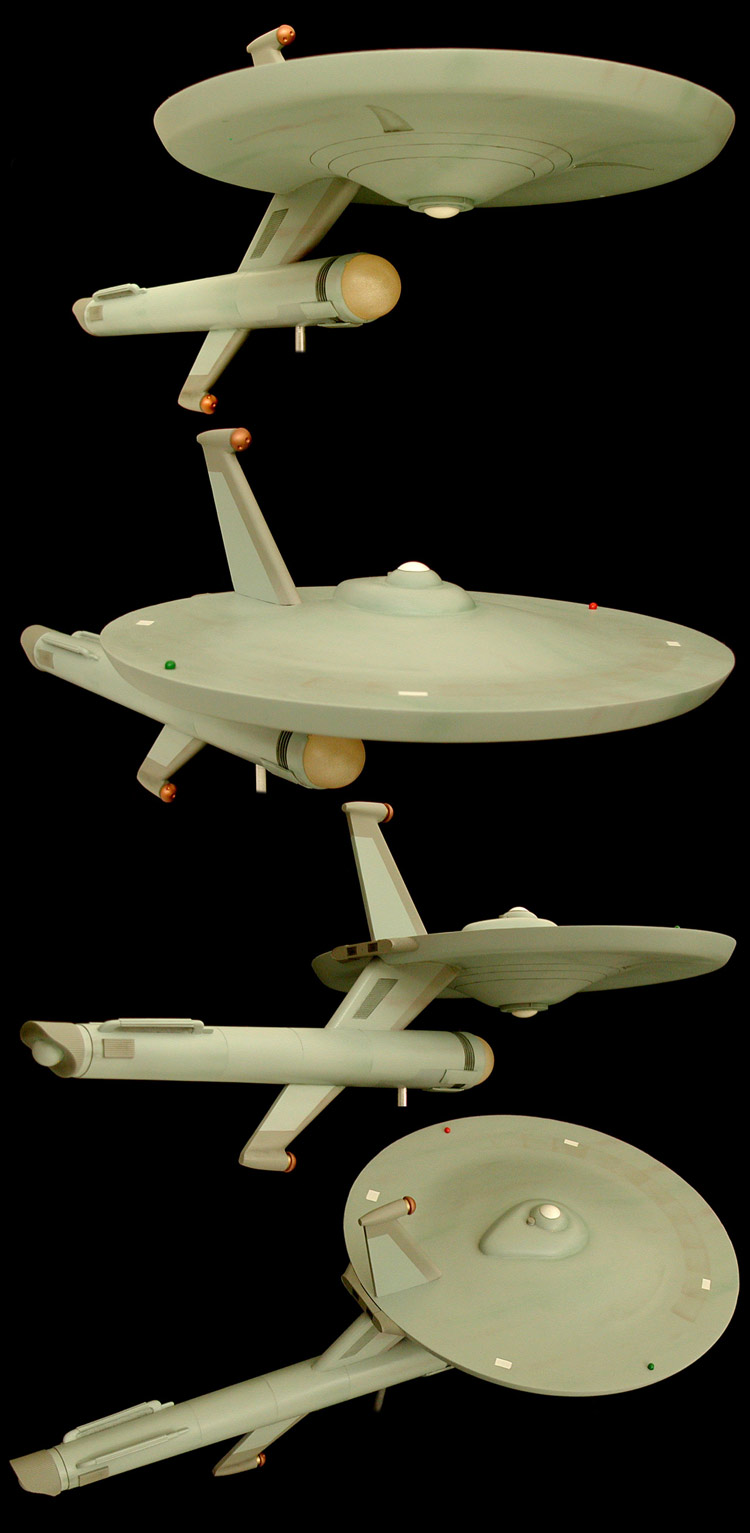 When drawing up the decal graphics, I use a standard font for most elements... but I modified the "6" and the "2" so that they would better stand apart from "9" and "5". 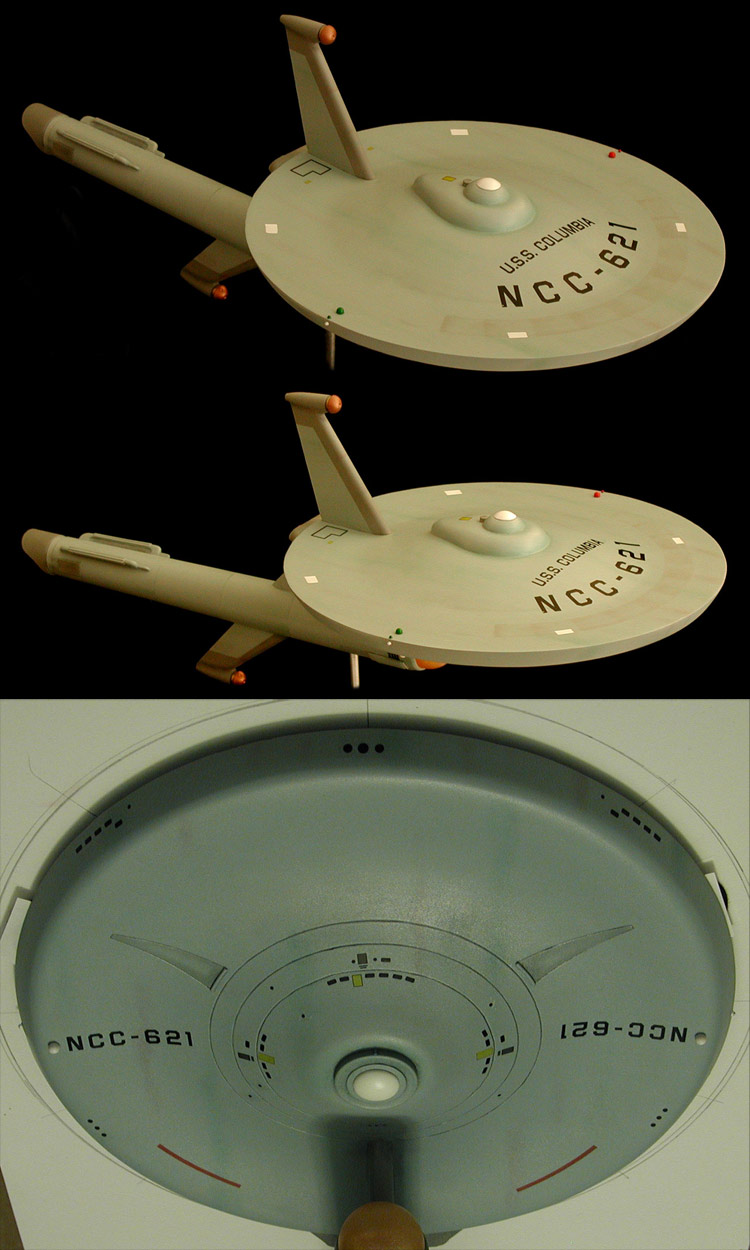 Final ModelAs I stated earlier, this version of the Columbia was intended to be a contemporary design with my Phase II Enterprise. As it turned out, while building that model I had more of the colored clear resin than I needed and had already finished the molds for the nacelle domes for this model. There was more than enough extra resin for one dome... which is all I needed. So the nacelle dome on the Columbia matched the fronts of the nacelles on my Phase II Enterprise. 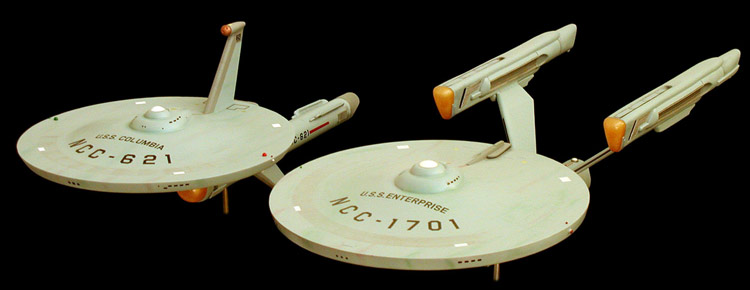 Here are a hand full of shots of the final model... 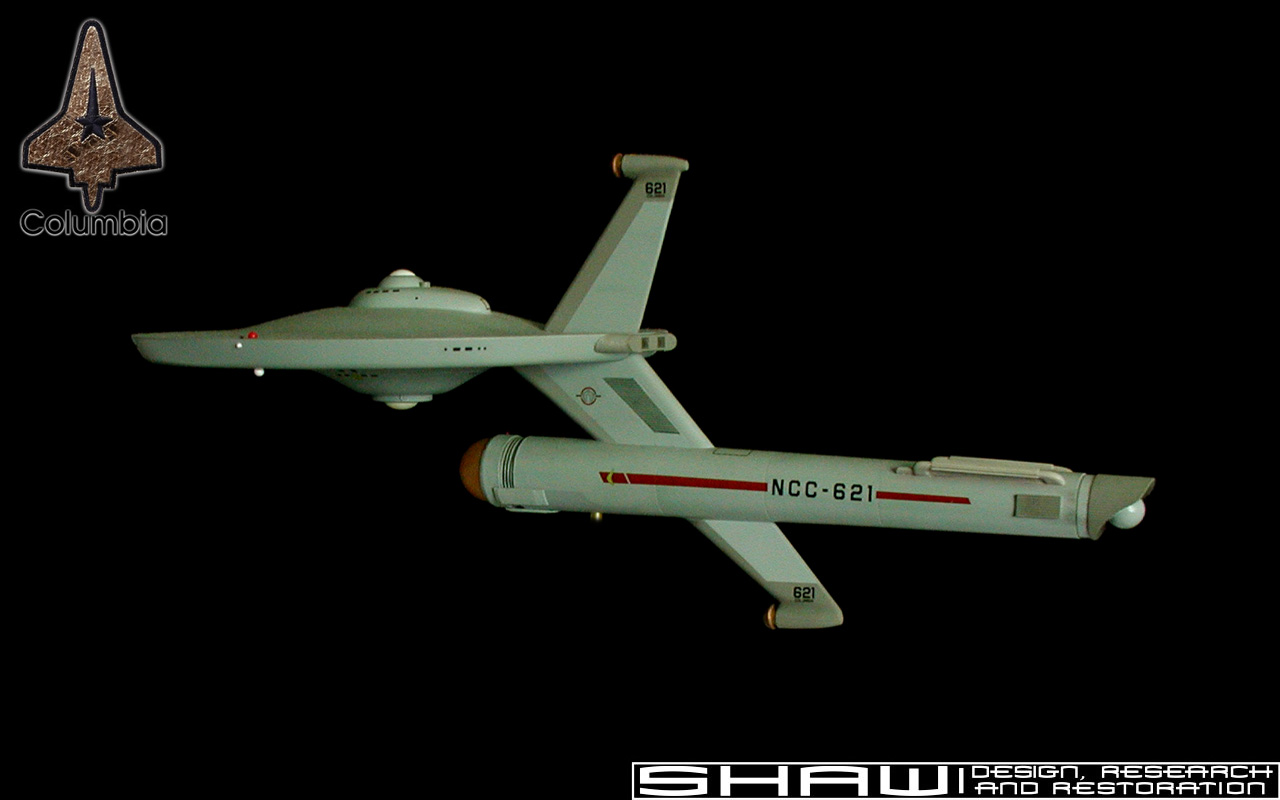 Click to enlarge 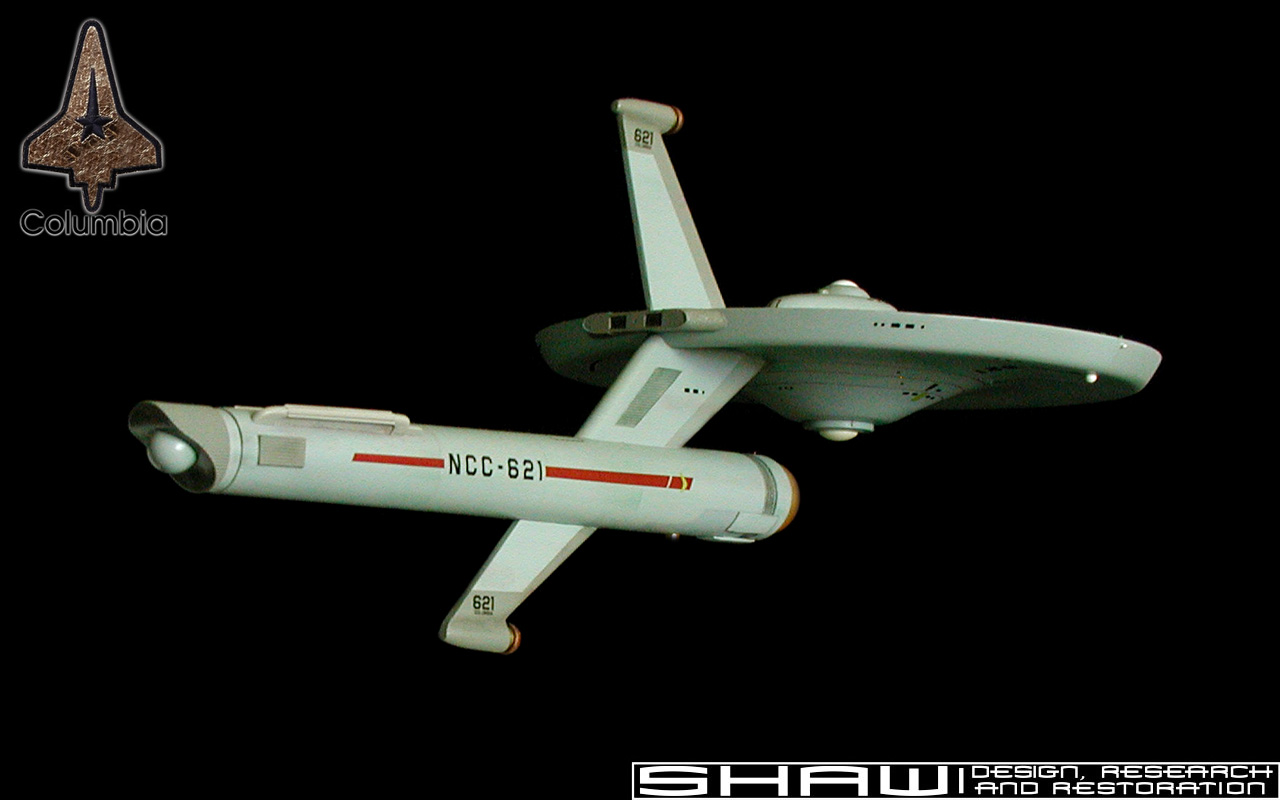 Click to enlarge 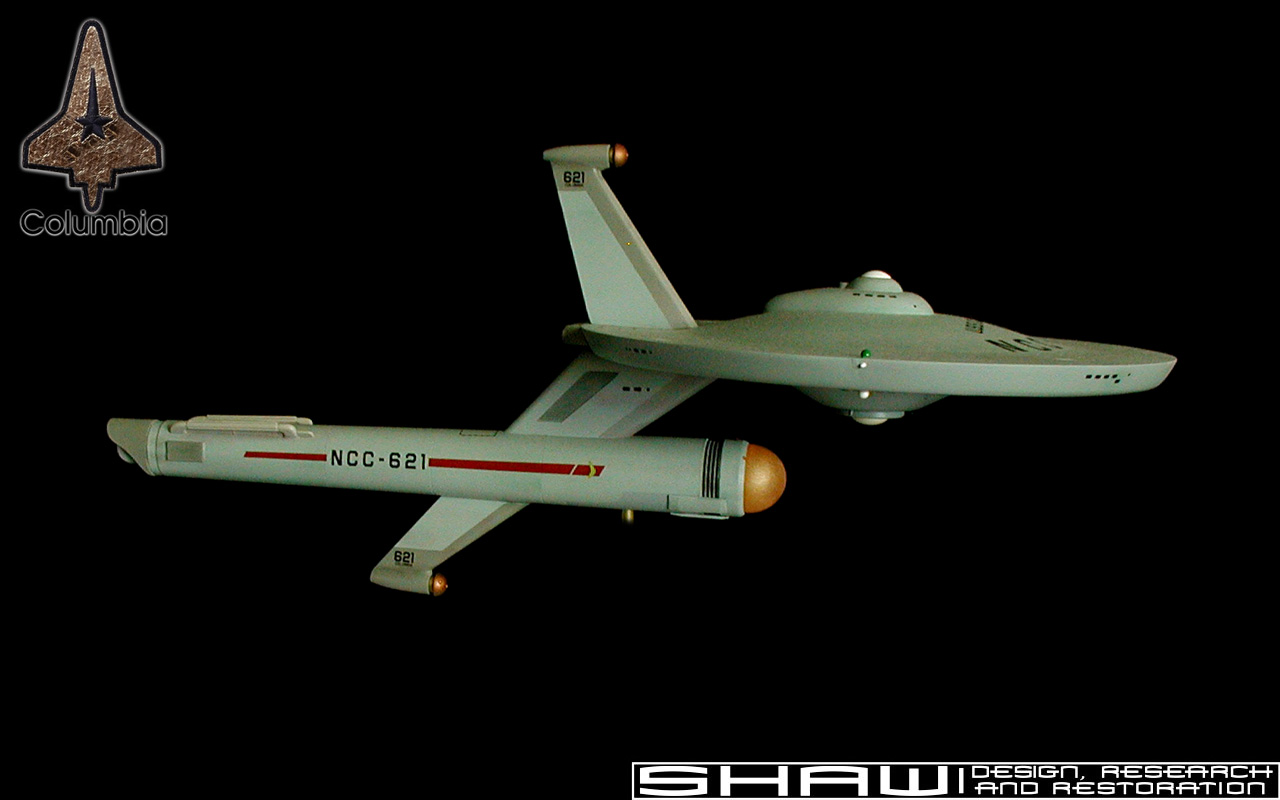 Click to enlarge 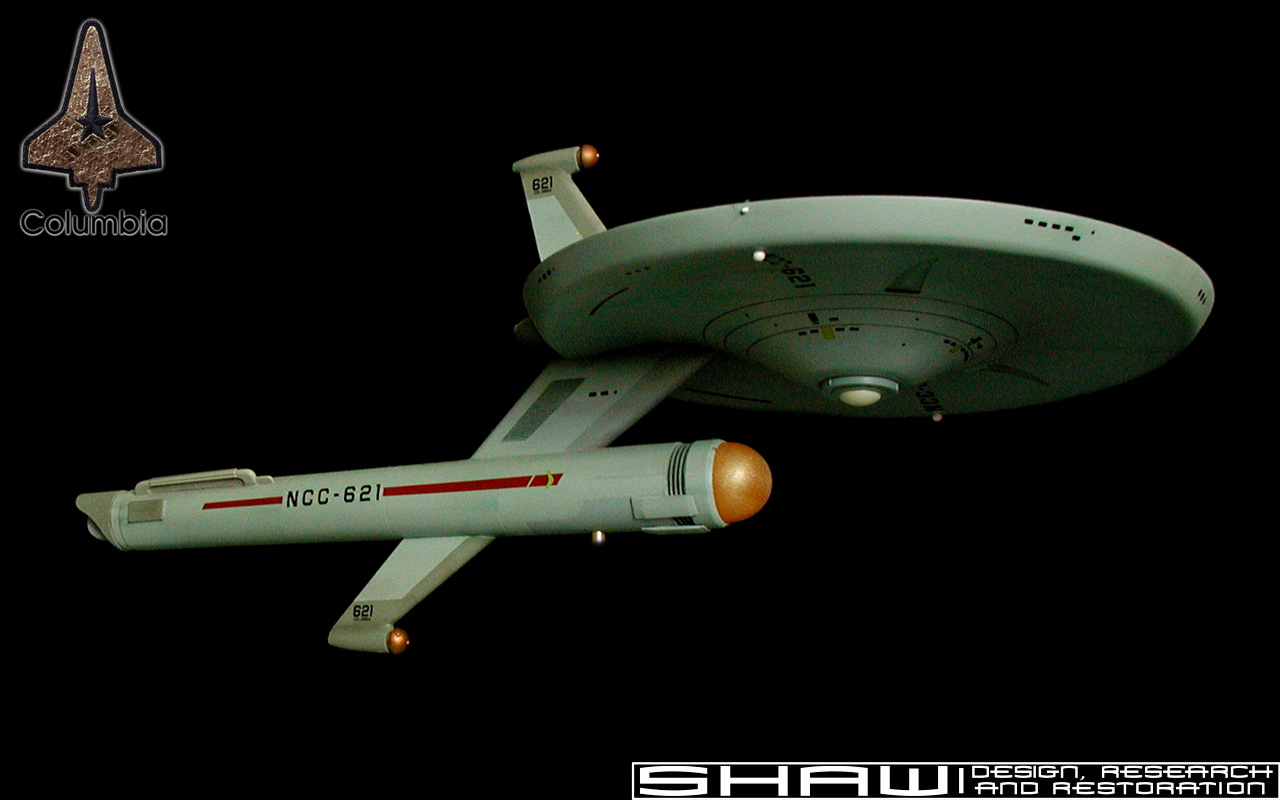 Click to enlarge 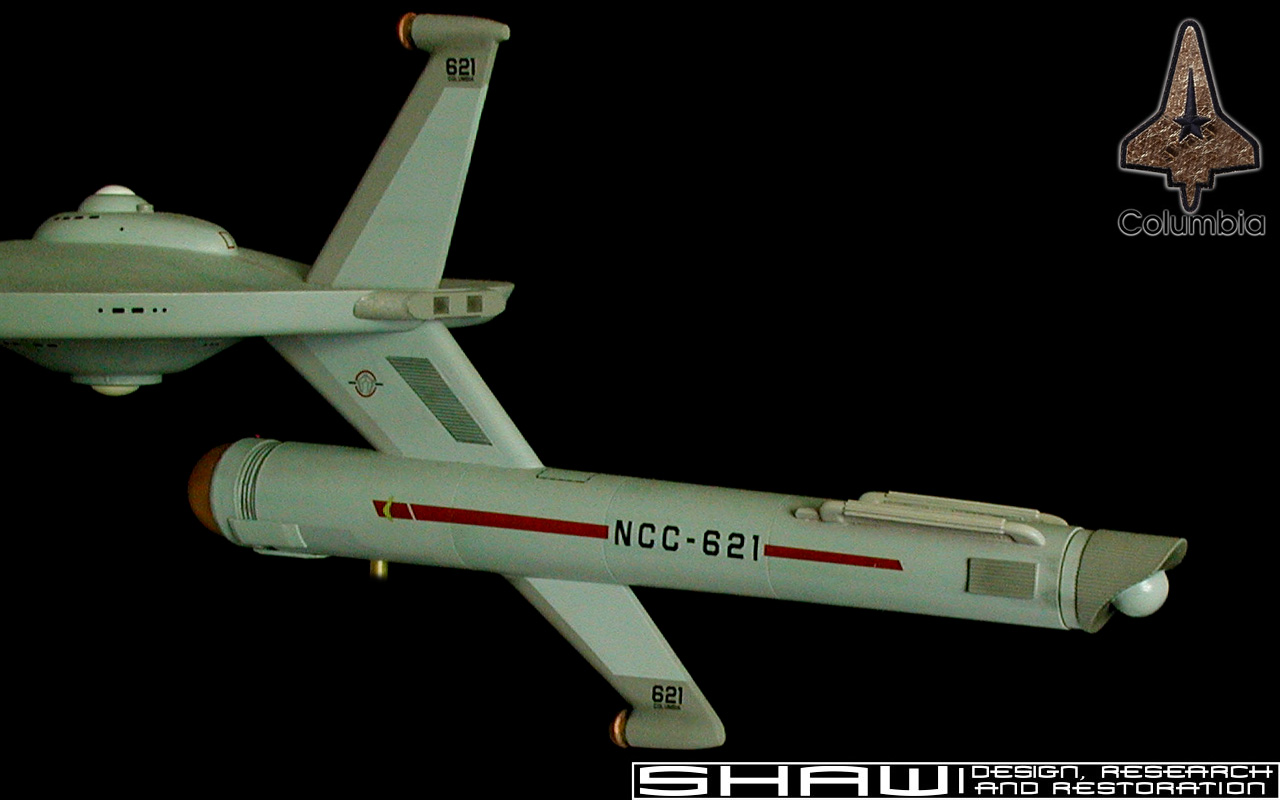 Click to enlarge And more images can be found here. |
